Wednesday, November 23, 2011

Give Thanks and Give Back

This week, most of us will be meeting with family and/or friends to...

                                                                                                      gather
                                                            fellowship
                                                                                              prepare

        give thanks
                                                                     play 
                          talk
                                            worship
                                             pray
                                                         shop
                                                                     celebrate
               cook
                   decorate
                               eat
                                                                           enjoy
                             be together...


and often, a little squabbling and nitpicking will take place too, as tends to happen whenever large family gatherings take place.  And perhaps, if you are lucky, you will get to spend some time in your creative space - be it your fully stocked art studio, or your spare bedroom-turned craft room, or your corner of the kitchen with a craft closet - and be able to do what your heart loves to do...MAKE.

Where-ever you will be, and with whomever you will be, I want to remind all of us to take the time to remember just how much we have to be thankful for.  As I tackled the project of cleaning and re-organizing (for what seems like the 100th time) my craft room this week, I was overwhelmed with thoughts about how MUCH STUFF I have, particularly because of a couple of other projects I had running through my mind.  I wanted to share them with you, because I think that during this time when we "Give Thanks," and before we all run out and buy a bunch of stuff for all the people on our Christmas lists, maybe we can "Give Back" a little too.  So...with that said, here are a couple ways we can use our crafts - or our craft rooms! - to "Give Back" this season!

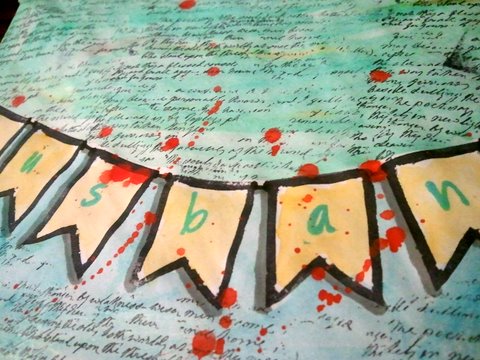
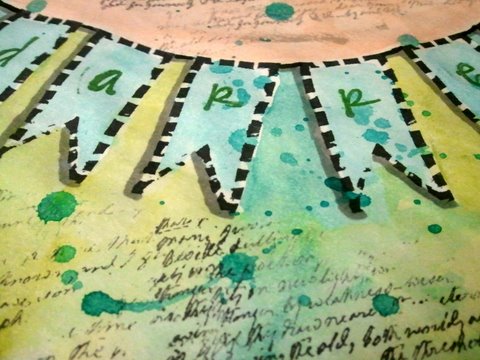
Handmade Book, image from Melody Nunez; www.melodynunez.com

Melody's Art Journaling Program

I "met" Melody online just a couple weeks ago, when I actually won a handmade journal she was offering as a giveaway on her blog.  It was while perusing her lovely blog that I found out about her awesome art journaling program that she does.  Every year, she collects art supplies and/or financial donations/gift cards so that she can get enough supplies to go into her aunt's classroom and teach art journaling to about 40 underprivileged public school children.  These children face a lot of challenges in their lives, and art journaling  is an incredible gift that she is providing them - an outlet, a way of expressing themselves, an awesome boost to their self-esteem.  While the "official" deadline has already passed, she has assured me that she is always in need of supplies, and the children are SO appreciative of the supplies!  Click on the link above to go to her site, where you can find out more about the program, watch a short video - where you will see some of the kids' artwork and how proud they are to show it off - and find out how to send donated materials.


St. Mary's Elementary - Joplin, Missouri

(Taken from Simply Handmade - Holidays, 2011)
"On May 22, 2011, a tornado swept across Joplin, Missouri, leaving a catastrophic wake of destruction.  Schools, businesses, and homes were destroyed and many were killed.  St. Mary's Elementary School, which housed pre-school through 5th grade, was demolished and is in desperate need of supplies and cash donations.  Several CHA members, including Niki Sivils and Kristi Parker Van Doren, have been coordinating craft supply drives.  Any monetary or product donation would be greatly appreciated.  The school has a wish list of products including school supplies, adhesives, plastic bags, pom-poms, yarn, crayons, markers, paint, paper and more."  Click on the link above to see the list and the address to which donations can be sent.

I know that as I'm cleaning and re-organizing - I'll also be DE-STASHING - (because, really?  Why do I need 12 pairs of scissors and 30 glue sticks?) ...and making piles of supplies to send off to some kiddos who will certainly appreciate them more than my dusty shelves and I do!  Won't you join me?

Tuesday, November 22, 2011

Ranger Distress Stains


I just wanted to write a brief note today to let you all know that you should hop on over to Craft Test Dummies to check out my post all about Ranger's Distress Stains!  Released earlier this year, they have quickly become one of my favorite products to work with.  They have all the wonderful qualities of Distress Ink - like reacting with water, blending easily, and a fantastic color palette - with the ease of a fluid dye in a dabber-top bottle.  I use them on SO many projects - like covering tag backgrounds:

Tag background covered with
Distress Stains
And there's this awesome way to layer the Picket Fence Distress Stain with the other 36 colors - I explain it all in my review on Craft Test Dummies.  This gorgeous, shimmery piece of Kraft Resist paper is all ready to add to a card front or some other project.

Kraft Resist paper covered with Picket Fence Distress Stain
and Fired Brick Distress Stain, then spritzed with
Biscotti Perfect Pearls Spray
I've used Distress Stains to mute patterned paper, to color backgrounds quickly, to "paint" in art journals, to add color to canvas art, to dye embellishments like ribbons/flowers/doilies to coordinate with projects, to "ink" stamps, to color neutral colored papers with...and I'm probably forgetting some ways.  To state that they are versatile would be an understatement.

 Have you tried Distress Stains yet?  What do you think of them?  I'd love to hear!  And remember to go check out my full review over on Craft Test Dummies!

Monday, November 21, 2011

Art Journal: 30 Days, Days 15 - 19

Okay, it's getting serious now - only 11 days left in our class!  Yikes!  BUT I am SOOOO jazzed about how this art journal page turned out.  I've never done an art journal page over black gesso, and oh my gosh - I'm so totally hooked!  (As in, I went out and bought another big jar of black gesso this week just to make sure I don't run out!  Ha!)  

These flowers...I have to tell you about them.  Because they started off being colored with my Caran d'Ache Neocolor II watercolor crayons - which I absolutely love.  I only own 13 of them, but I adore them.  I have 2 other kinds of watercolor crayons (did I mention I'm a watercolor junkie?), and while the Stampin' Up watercolor crayons ARE pretty decent, neither they nor definitely not the Reeves ones can hold a candle to the Caran d'Ache crayons.  And I was SUPER excited to learn that they would color over black gesso and show up!  How awesome!  The first time I colored, I added water, and didn't really care for the results...so I colored over them again and just left the crayons.  It was pretty cool looking.  But they just weren't popping quite as much as I liked.


And THEN, at Aaron Brothers, I found these awesome things - I say "things," because they are sort of a cross between a pencil and a crayon - they're made by Stabilo, and they're called "Woody 3-in-1" - and they work as a crayon or a colored pencil or a watercolor crayon.  


Anyway, I got them, and I colored over my flowers again - and SHUT THE FRONT DOOR - look at how bright my flowers got!!!  These babies rock!  


How much fun is this, with all the white journaling (done with a Pentel Sunburst gel pen), and the doodles (if you haven't tried the Sakura Souffle pens, you MUST), and most of all...those incredibly brilliant, vibrant pops of color in those flowers!  (And YES, I know I spelled "believe" incorrectly...but it was so pretty, I didn't want to mess it up by trying to fix it...such is life!)  

Anyway - if you haven't given black gesso as your base a try - you should try it out!  SO MUCH FUN!

Supplies Used:

Saturday, November 19, 2011

Do you love a good STAMP sale?

If you read my last post - you know, the one where I dove head first into carving my own stamps? - then you know I *love* stamps.  I must...if I am willing to go to all the work of carving my very own, right?  Um, right...well, you should see the drawers full of stamps that I own, that I did NOT carve myself.  LOL  I do love stamps.  And one of my very favorite brands is Unity.  Seriously - they have some of THE cutest and most gorgeous stamps out there.  (And they're not paying me to say this...really!)  I even did a review of them for Craft Test Dummies earlier this year - you can read it here.


Anywho, I just thought I'd let you know that the great folks at Unity are having a FAB-FANTASTIC sale - like SERIOUSLY awesome sale - 45% off ALL of their stamps!  Plus - only $2.95 shipping...and if you spend $58, they'll ship your order FREE.  I mean - seriously - how can you go wrong?  The sale started Friday and goes through Wednesday...but I wouldn't wait to start shopping, because I can promise you that your favorite stamps will be LOOOONG gone soon!

So I'll be making MY wish list and passing it along to, oh, say my hubby and mama and maybe a friend or two...how about you?

Hand-carved Banner Stamps

A couple weeks ago, after seeing Julie Fei-Fan Balzer use a hand-carved stamp in her art journal during our 30 Days In Your Journal class, I was inspired to get the things needed to carve my own stamps.  And then they sat on my desk.  And sat.  And sat.  I was intimidated to actually carve into the blocks, afraid it would be too hard to do, afraid my shaky and weak hands wouldn't be able to do it, afraid I'd mess them up.  And then Julie posted THIS post on her blog, and I just couldn't contain myself any longer...because I'm such a sucker for banner stamps.  I don't actually own any...but I adore banners.  I've been wanting some banner stamps for, well, forever.  

So the other night, while watching t.v., I finally opened my carving tools, and the block of carving material, and I took the leap.  And a couple hours later, I had four beautiful hand-carved banner stamps!  I was SO ELATED!  And let me tell you - THIS IS ADDICTING!  I have so many ideas now...I'm super excited!


Tomorrow is my husband and my's 7th anniversary, and while I didn't get make his cards, I decided to decorate the envelopes...using my new banner stamps and some watercolors.  I am totally in love with how they turned out!!  (I intentionally carved my stamps so that my alphabet stamps would fit in them.)


(I am trying to start including a list of products I use when I can, when I show projects I've done - I hope that makes it easier for you to know and understand what I've done, even if I don't write a step-out tutorial.  Also, if I can't find a link to exactly the materials I've used, I'll list a couple of similar products which could be substituted for what I used.  Disclaimer - these are affiliate links, so if you purchase something from the links, I will get a very small bit of pocket change from your purchase - so it helps you and me keep our art supply shelves full!  ;p  Additionally, you may have noticed under the header of my blog, a page titled, "My Favorite Art Supplies."  This is an Amazon store I have set up listing some of MY favorite art supplies and books - to make it easy for you to find the things I use everyday.  There is even a shopping cart right there, so you don't even have to leave my blog!  How fun is that?  Just to clarify - you aren't paying anything extra - the store is just giving me a few pennies from your purchase as a thank you for referring you.)

Products Used:

Tuesday, November 15, 2011

Art Journal: 30 Days, Days 11-14

Wow, it's hard to believe that we are already half-way through our class with Julie Fei-Fan Balzer, 30 Days In Your Journal.  I think I'm going to need a support group after we're through...I'm having such a good time in the class, and the accountability is awesome.  I love being able to post my pics to the Flickr group and receiving feedback from the other class participants, as well as seeing how everyone else in the class is interpreting Julie's instruction and ideas.  When I started, I wondered if I'd really be able to commit to art journaling every day for 30 days, and now, suddenly, 30 days seems like such a short time.  I find myself wishing the class was just a bit longer!

Anyway, here is my spread for days 11-14.  I am super happy with how it turned out.  The page on the right was a background I had previously completed during Christy Tomlinson's She Had 3 Hearts art journaling class...but I didn't know where to go from there.  It was really bright, and even though I loved the page, I just wasn't sure what to do with it.  The page on the left previously had a couple random stamps on it, which didn't turn out well, so I had painted some random paint over it.  Then when we prepped these pages, with Color Wash sprays, I just let the sprays cover the paint.  I used colors that would complement the colors on the right page, and then on the right page, decided to use white Golden Airbrush paint to create drippage and soften the colors.  


Once the journaling was done, I did the large writing and the doodles using a paint brush and black fluid acrylic - my first time successfully doing so!  It's really hard with my shaky, weak hands (due to my neuropathy and rheumatoid arthritis) to do detail painting, so I was super excited when I was able to successfully paint the writing and doodles!  I used fluid acrylics to paint in the painted writing and doodles.  I used oil pastels (cheap children's ones from Faber-Castell) to lighten the circles with the numbers and to darken the other circles.  

There is still plenty of time to join the class if you are thinking about it - the classroom is going to be open for 3 months.  Come on over and join us!

Monday, November 14, 2011

Art Journal - 30 Days In Your Journal, Days 6-10

Well, I finished up my second 2-page spread in my art journaling class, 30 Days In Your Journal with Julie Fei-Fan Balzer (actually...I finished it up on the 10th...and I'm close to finishing up another spread by now).  Still loving the class, though I'm not sure I love this particular spread.  But.  But.  I'm TOTALLY OKAY with that.  

Why am I okay with that?  Because I journaled all of those days.  And I used up junk tags from my junk stash...you know, tags that didn't work out when I was trying new techniques or whatever; and I used a receipt; and I used a note from a company I was doing a review for...stuff from my everyday life - and THAT is cool.  I like that.  Plus I used a couple embellishments from my always-growing embellishment stash, a couple that have been in there for going on a year or so, that really needed to be used.  


So even though the page itself isn't my favorite (I think maybe it's the colors I used on the background, because I do like the colors of the tags I used and the colors I splashed on the receipt/postcard/etc.)...I am happy overall with the fact that I did it, and with all that is encompassed on the page.  Does that make sense?

Friday, November 11, 2011

The Crafter's Workshop: "Ava" Stencil

Today over on Craft Test Dummies, I have posted my second review (here's my first) of the stencils made by The Crafter's Workshop.  You've seen me write about them here before, and I've shown you projects I've used them on...so you already know that I love them.  Today I wanted to show you one of the face stencils - Ava is her name - and just how versatile she is.  I showed you an art journal page in my last post, where I used her in her most basic form...I simply traced her lines with a Pitt Artist Pen, then went over the lines a bit with some oil pastels.  I didn't color in her face, no paint, nothing...very simple.  But today, I'm showing you my very first attempt at something completely different (no judging allowed...I just told you, this is my FIRST ever attempt...!).  

I started out in a 9x12 art journal by scribbling all over the paper with Derwent Inktense watercolor pencils, and then adding water with a brush.  I love these pencils because once the color is dissolved and dry, it is permanent and is no longer water-soluble...so you don't have to worry about it moving around on you as you work in layers over it.


Then I placed the 6"x6" Ava stencil on my page.  I decided I was only going to use the face and neck portion of the stencil, so I traced those parts with a pencil onto my page, along with just a bit of the hair as a guide for reference.  You can just barely see my pencil lines in the photo below - I wanted to keep them light so they wouldn't show through the paint.


Then came the challenging part...for me, at least.  I've *never* painted a face before.  Not ever.  Nor have I ever drawn a face.  I am clueless when it comes to shading and shadows and all of that...you know, the technical aspects of art!  (I really do want to take some actual art classes someday and learn these things!)  So I just went for it and started adding paint.  And my first attempt was a hot mess...but fortunately, it's just paint...so I added some more paint, and painted right over her, until I found a happy medium.  I knew ahead of time that I wanted to put long, flowing hair on her (though I hadn't really planned on it being *quite* so poofy...but hey...what can I say...she wanted to have poofy hair!).  So this is how she looked after I painted over the traced lines.


And then the magic happens.  I placed the stencil BACK on her, and used a cosmetic sponge with some Claudine Helmuth Black Gesso (LOVE that stuff!), and I stenciled in her eyes, nose, lips, chin, and neck lines again.  It's AMAZING what an instant transformation just that little bit gives.  That gave me a guide.  Then I used my paint brush and continued from there, adding her eyebrows completing her mouth, and filling in all the hair lines.  (I also went back in with some white to add a few highlights on her face and neck...it seemed to help.)


Now the page is all ready for me to add some other elements and do some journaling.  While I know she's no masterpiece, having never painted a face before, I am pretty happy with how she turned out...and I owe it all to my friends at The Crafter's Workshop!  

For more details on this and other great ideas for using the face stencils, be sure to check out this great post on stencil designer Julie Fei-Fan Balzer's blog!!  And make sure you hop over to Craft Test Dummies to check out all the other things I did with these great stencils for my review!

Are you a fan of The Crafter's Workshop stencils?  I'd love to see links to projects you've made using them!

Supplies Used:


BLICK ART MATERIALS: Save up to 82% on Select Items through November 16th!

Saturday, November 05, 2011

Art Journal Pages

I mentioned in my last post that I'm taking Julie Fei-Fan Balzer's online workshop, 30 Days In Your Journal.  What's so awesome about this class is that she really focuses on showing you how to fit art journaling into your life every single day...for just 10 minutes.  So you don't do a page or a spread a day - you work on a two-page spread for several days, adding a bit at a time.  In the past, I've usually done entire pages (or more) in one setting, though I have sometimes gone back and added layers - and I do have multiple pages in multiple journals that are in various stages of work.  But this idea of really limiting myself to 10 minutes a day is new to me.  And I think it could work, and I think it just might be the key to actually being able to art journal more frequently - because finding chunks of time to sit and play is usually what prevents me from doing it as much as I'd like.  So we'll see how this goes.


At any rate, after the first 5 days, I've completed this two-page spread.  It's much busier and fuller than most of my art journal pages normally are, but I'm okay with that.  I did a lot more actual journaling than I often do, which I like, and less time-consuming processes than I've used on other pages...which I'm torn about.  I really do like playing with new mediums and trying new techniques in my art journals...but maybe those should be saved for the times when I have bigger chunks of time, and my "10 minutes a day" art journaling can be a bit more basic.

I *love* the black stamped hand on the left side.  That was done with a Styrofoam stamp I made by tracing one of the hands from the Henna Hands stencil (also designed by Julie Fei-Fan Balzer) from The Crafter's Workshop and then using a technique I learned in the Random Creative Scrapple Doodle workshop by Stephanie Ackerman.  I used Claudine Helmuth's Black Gesso to stamp with, and then journaled on the hand with a white Sakura Glaze pen (new to me - totally in love!).  I also used the Punchinella stencil from The Crafter's Workshop (another one designed by Julie) to add layers of color with Distress Ink and Paint Dabbers randomly over the pages.  I am absolutely addicted to The Crafter's Workshop Stencils...I use them ALL THE TIME - seriously!  If you haven't tried them, you definitely need to check them out.  (I reviewed them earlier this year on Craft Test Dummies, and will be writing an updated review in a few weeks, covering the newer releases.)

The remainder of these pages were done some time ago - back in July/August, I believe - when I was taking Christy Tomlinson's She Had 3 Hearts workshop.  (Can you tell I love taking online workshops??  That's what happens when you're a stay at home, home-schooling mom of four children ages 6 and under!)


I did an image transfer (the row of scissors on a shelf) on this page, and played with melting some crayon wax.  I really like how the green wax blew across the page in little droplets when I used my heat gun to melt the crayon!  I also love the stack of hearts - canvas, glassine paper, fabric, and a rusty metal heart that I dipped into melted UTEE (which I had colored orange with Pan Pastel).  I used a little clip of some kind that I got in a random assortment of trinkets from this way cool store Zinnia to clip the hearts together.


I used another stencil from The Crafter's Workshop on this page - Ava - to create the girl's face.  There are SOOOO many ways to use this stencil - check out this blog post about the face stencils to see just how versatile they are!  I also used another of their stencils for the journaling.  I dripped acrylic inks on the page for drippage, and used acrylic inks to color the scallops around the edges of the page as well.  To make the scallops, I just punched circles from vintage music paper, vintage book text, vintage dictionary pages, old map pages, etc., and glued them on the page hanging off the edge and then trimmed the excess.  I love using vintage papers!!


This is another fun page.  I used Adirondack Colorwash Sprays and - surprise - The Crafter's Workshop stencils on the background (along with an alphabet stencil from...???).  And then I played with wax.  I used clear beeswax at first, and then added some blue crayon to the wax to color it a bit.  I stamped into the wax in the upper left hand corner using Unity's Giving It All Meaning stamp - what awesome texture that created!    And I love Prima's Chickenwire stamp, which I used to add texture over the wax and around the edges.  I was happy to discover that the Pitt Artist pens from Faber-Castell write easily even over cooled beeswax!  


This last page was super fun.  I can't claim credit for the idea of rolling the paper - another student in the workshop did that on a page in her journal, and then Christy actually did a piece of art on her blog inspired by it, which is when I saw the technique.  Anyway, it was my idea to roll them up and glue them to the base, then cut them out in a heart.  Then I actually did my journaling - using the Pitt Artist pen - right on the rolled paper heart!!  It wasn't anything I really needed anyone else to be able to read - and I know what it's about - and that's all that matters...so I was okay knowing that the writing was going to get covered up.  Unfortunately, my heart has gotten rather smooshed from my journal being closed - I should have taken a picture right when I made the page - not several months later!

And then...came the string gel.  Have you ever played with string gel?  Well, I hadn't, prior to this page...and boy oh boy, was it ever fun!  I fell in love with the stuff!!  Basically, it's this polymer stuff, and it starts out clear, so you need to add some paint (or acrylic ink) to color it.  And then you let it sit for a while - I want to say like 2 hours or so.  Then you take a spoon or a palette knife or whatever, and you scoop some of it up, and you basically drizzle it all over your project.  It's SO fun - makes you feel like a kid!  It's totally messy and awesome and fun.  When it dries, it still looks wet, and it's glossy and dimensional - and did I mention it's FUN?!  Seriously.  {Just don't make the same mistake I did.  I had some extra string gel - which of course, I didn't want to waste.  So I drizzled it on the page facing this one, figuring I'd play around with that page too.  I wasn't thinking...now I have to keep a piece of wax paper in there all the time, or the pages stick together because the string gel on the two pages wants to stick to each other.  Live and learn.}

Anyway, hope you enjoyed those.  If you want to learn more about art journaling, you really should check out Julie's class - she really tells you exactly what she's doing and why she's doing it, every step of the way.  It's great for beginners or for more advanced artists who just want some inspiration.


BLICK ART MATERIALS: Save up to 82% on Select Items through November 16th!

Tuesday, November 01, 2011

Happy Halloween!

Yeah, I know - Halloween was YESTERDAY!  It also happened to be Jeremiah's FIRST birthday...so we were a little bit busy around these parts.  :)  I cannot believe he's already a year old, and that he's been a part of our family for 7 days shy of a year!  Wow!

Even though I'm a day late (and usually a dollar short...or lots of dollars short, as the case may be!), I did want to show you a couple of Halloween projects I made using Authentique's Glowing line, for my post on Craft Test Dummies yesterday. Really, you need to go check it out, because in my post, I explain how I made everything.  Both projects were super easy, and I think a Christmas version of these cans will soon be in order!

Burlap-covered tin cans, with
Authentique Glowing line embellishments

Scrapbook layout, ready for photo, made with
Authentique Glowing line
Anyway, we took all the kids to Knotts Berry Farm on Friday - in their costumes, of course - and we had a great time.  Then yesterday, we all visited the BRAND NEW HOBBY LOBBY that just opened.  It's about 40 minutes from here, but YAY for having Hobby Lobby!  And last night we started off at our church's Hallelujah Night, but after standing in one line for 15 minutes to get a couple pieces of candy, we changed plans and went trick-or-treating back home in our neighborhood...which turned out to be a much better plan.  The twins were hilarious...this was their first year trick-or-treating, but once they got the hang of it, they were hamming it up!  Mackenzie in particular was so cute - she would get her candy, and then just keep standing there, saying "trick-or-treat" over and over, with her bag open, until the people at the door, confused as to why she wasn't leaving, gave in and gave her more candy!  She was really working the neighborhood...and by the time we got home, she was dragging her bag on the ground because it was so heavy - she ended up with almost double what the others got.  (It's all good - we always pour all the candy into one big bowl.)  The kids are satisfied with their new stash of lollipops, and mom's satisfied with the new stash of chocolate!

In other news, Julie Fei-Fan Balzer's new 30 Days In Your Journal class starts today - are you taking it?  I'm getting it as an early birthday gift from a friend.  I think it's a great deal for the amount of information she's providing.  I love all of Julie's work, and I am addicted to the stencils she designed for The Crafter's Workshop (you can see some of them in my project for the Halloween blog hop I participated in a couple weeks ago).  Anyway, I think it will help me with my art journaling...I kind of feel like I'm all over the place and need to get in a groove.

That's all for now.  I have some other projects I've made for Craft Test Dummies that I still need to show you...later this week!

LinkWithin

Related Posts Plugin for WordPress, Blogger...