Thursday, December 31, 2009

Craft Room Re-Do

So, as I explained in my last post, I haven't been doing much crafting lately...but even if I COULD have been crafting, I really COULDN'T have been crafting, because my craft room looked like an explosion had taken place. Somehow, slowly but surely, I had managed to accumulate so much crafting STUFF that every surface in my room was covered. And the day after Thanksgiving? I bought TONS of fabric - which was all still piled in bag after bag, on the floor, behind my desk...making it impossible to even get to my chair!! I had NO STORAGE left, and no ideas on where I could add storage without spilling into other rooms of the house (which my dear, wonderful hubby, who is so generous to allow me to take an entire room of the house for my crafts in the first place, was NOT in favor of!).

In steps my dad (who is visiting us for a long winter's vacation from New Hampshire), along my wonderful hubby, with a brainstorm of an idea. Replace my desk with a homemade workstation, at counter-height, with storage underneath! BRILLIANT! Initially, my dad suggested kitchen base cabinets, but upon measuring how much space we could work with and figuring out the cost, it was going to be more than I could afford to spend. Then I remembered seeing something similar to what I needed on Jona's blog a while back. So off to Ikea we went!

A day of building and a day of organizing later, this is what I have!!! I'm so happy!!


The workstation itself is made up of 6 metal shelf carts from Ikea - 3 are 36" long by 14" deep ($39.99 each), and the other 3 are 18" long by 14" deep ($34.99 each). They are arranged in such a way that I have about 15" of leg room on the back side, where I'll be sitting and working. The top is one piece of 83"x44" pressboard and one piece of 83"x44" gloss white flat wall paneling (total of about $35.00), glued together with Liquid Nails. To attach the top to the shelves, my dad screwed eyescrews into the bottom of the worktop, then used 20-guage wire and wired the shelves to the worktop. He also wired the selves to each other, so they'd stay in place and not shift around.

I used double sided sticky tape to put my cutting mat (24"x36") on one end of the workstation, so that it won't move around. I LOVE that I can have it there all the time and not have to move it around (and not be working on top of it all the time like I was on my old craft desk)! I have my printer and my Cricut on the other end of the workstation, and still have TONS of workspace. I do need to get a new chair, because my old chair doesn't raise up high enough. The workstation is the perfect height for standing at, though - which I often like to do, especially when I'm cutting fabric, and my back used to get so sore from leaning over to cut fabric on my desk!


I have my sewing machine cabine at an L-shape to my workstation, which is the same as it was with my old craft desk. It works out well there for me.


The storage cubes to the right of my workstation. They mostly hold scrapbooking/papercrafting supplies, stamping supplies, embellishments, etc. (The cubes are from Target.)


You can see that my serger is now sitting on the long desk against the wall behind my workstation, so I basically will be sitting in the middle of all of my crafting "stuff." Isn't it AWESOME?!


This is the view from the working side of my workstation. I have the things I use most often on the working side...my sewing basket, Xyron, Sizzix, dies, Cricut cartridges, a box with elastics/zippers/etc., a box with cover-yourself buttons/magnets/etc., a drawer for purse handles, a basket for sewing works-in-progress, and space on the floor for big tubs of things like sheets, clothing blanks, and tulle/ribbon/etc.


On the front side of the workstation, the shelves hold mostly fabric...felt, flannel, a bag of tulle, some corduroy, chenille, and other varilous fabrics. There is a box of cloth diapers for making burp cloths, an art kit of the kids, and even an empty shelf (with empty plastic boxes).


The shelf on the end holds all fleece - bulky stuff!!


My serger on the back desk, which is built into the niche in the wall (this is supposed to be the formal dining room of the house). That cabinet is filled with items to be recycled or altered.


The kids' desk..not much has changed (although it's much cleaner now than it was a week ago).


The view from above, on the stairs.


So what do you think? I am IN LOVE!!!! Signing off to go do some crafting...

Monday, December 21, 2009

WHERE in the world is JEN????

No, I did not fall off the planet. Yes, I am still alive. Mostly.

What I have NOT been doing...
  • blogging
  • crafting (much, anyway)
  • sewing
  • knitting
  • scrapbooking
  • cooking
  • cleaning
What I HAVE been doing...
  • laying down with a hot rice pack on my abdomen
  • taking copious amounts of painkillers
  • doing as little as possible
  • going to the doctor a lot
  • having many medical tests
Apparently, sometime since my tubal ligation, I have developed a case of both endometriosis and adenomyosis, both of which are significantly impeding on my quality of life (and that of my family, I might add!). At this point, my doctor is planning to do a hysterectomy sometime in February or March, after Mackenzie's next surgery, which is scheduled for January 11. Ahh...so much fun in store for us!!!

At least the doctor did give me better drugs at my last appointment, so I HAVE been able to function somewhat better over the past few weeks...so I have been able to get out to do some Christmas shopping and I have slowly been getting back into some crafting and I even stepped on the serger pedal today for the first time in a couple months.

Prayers for pain relief for me, a successful surgery for Mackenzie, and a quick and successful surgery for me would be greatly appreciated...so that I can get back to being the crafty me that I like to be!!!

Monday, October 19, 2009

My to-do list

On my to do list...
  • Start making Christmas gifts
  • Get our website up and running
  • Make a Christmas list - who is getting what, and what am I making???
  • Get our website up and running
  • Make stuff to put on the website
  • Get rid of this wretched cold
  • Is Christmas really coming??
  • Did my sister and I really start a business together???
  • Pray!!
  • Clean this filthy house - or at least the filthy floors!
  • Breathe
  • Make Anthony a blanket, because he's jealous that I made blankets for the girls
  • Get my car out of the shop...$1000 later...OUCH!
  • Get to JoAnn's while the flannel and fleece is on sale
  • Knit something - anything - get SOMETHING on my needles!
  • Stop coughing
  • Decide which fabrics of the new lines coming out I MUST have
  • Hurry and sell some stuff so I have money to buy said fabrics
  • Pray!
  • Manage all of Mackenzie's Early Intervention and speech therapy and cleft team appointments.
  • Get rid of this Darth Vader boot so I can sew with my right foot again
  • Have surgery...don't ask where...you don't wanna know...trust me.
  • Make more time for date nights - really, we had the BEST time Friday night!
  • Figure out how to do all this and still slow down so that I don't get another cold the minute I get rid of this one.
  • Pray some more.
  • Thank God I don't have to do all of this alone!
What's on YOUR to-do list? How do you manage it all?

Tuesday, October 06, 2009

Birthday party bash

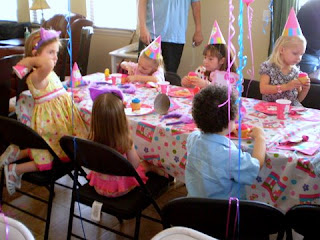
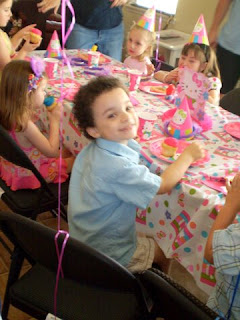
Pics from the birthday party we went to - this is for the little girl who was the recipient of the little twirl skirt. I just LOVE these little party skirts with the yoga tops that I got for the girls on clearance from The Children's Place a while back. They also have matching bolero cardigans, but it wasn't cool enough yet for them to wear them.

Our little friend Layla, so sweet in her dots. Her big sister had a matching dress!

The kids all lined up to do the limbo!

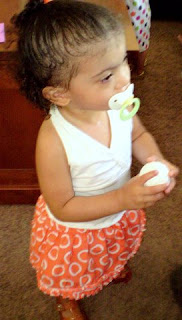
Makayla and her beloved binky.

The party girl, Sage, and her lovely mama, Heather.

Our little friend Abby - her daddy did NOT scrape the brightly colored icing off her cupcake, like I did off my girls' cupcakes, before giving it to her...obviously!!!

Wednesday, September 23, 2009

Children's Artist Tote

I've been wanting to figure out how to make an artist tote with carrying handles for a while now. I've seen a few online in various places that I liked, though none that were just exactly what I wanted. I saw one pattern for purchase, but didn't want to spend money on a pattern when I was pretty sure I could figure it out on my own if I just sat down and really thought about it for long enough. So I finally sat down at my desk with my notebook in hand, looking at a tutorial for a regular crayon roll, and eventually figured out what I needed to do.

This particular one was a birthday gift for one wild-animal loving little boy who turned 4 recently. We weren't able to make it to his party, thanks to my recent health issues, but I was glad to finally be able to give him his gift yesterday, and was relieved to see that he loved it and immediately started drawing! Hopefully he will continue to use the pencils only for drawing and not as a weapon against his toddler-sister!! Hee hee. (I wonder why I would ever think of such a thing...that would NEVER happen in my house!)

I made the pockets taller, for colored pencils, but it would be easy enough to adjust the pocket height to accommodate crayons instead of pencils. I used elastic and a covered button for the closure.

Monday, September 21, 2009

Twirl skirt

Now that this gift has been given to one sweet little very girly-girl, I can finally post pics!! This cute little girl's twirl skirt was made using Jona Giammalva's Edith Twirl Skirt pattern (from Fabritopia - LOVE this store, folks, and if you click on her name, it'll take you to her awesome blog!)

I found the main fabric - a SUPER girly fabric that says "When I Grow Up" all over it, with images of purses and high heeled shoes and pearls and such - at Mardens in Maine when I was on vacation visiting my sister in June...for $2.99/yard! It is just so cute, I can't even tell you - the pictures don't do it justice! I haven't found it online since - I don't even know who the manufacturer or designer are!

The contrast fabric is by Joel Dewberry from his Aviary line, and the bias tape (homemade again, NOT using the bias tape maker this time, thanks to GREAT instructions from Jona in the pattern), is fabric from the Andalucia line by Patty Young.

This was a fun skirt to make, and I can't wait to see it worn. I will say that it will be MUCH easier to make, though, now that I have my serger!! All that gathering took quite a bit of time on my regular sewing machine!! The great part is it's ALL straight lines - so if you can sew a straight line, YOU can make this skirt! The pattern is a PDF pattern, which means you get to download it immediately, and she includes measurements for sizes 2 - 6. So go ahead, give it a try!! You WON'T regret it!! And neither will the little girl who gets the pleasure of wearing such a special skirt!

Sunday, September 20, 2009

An apple a day and a new serger

We're going apple-picking with my moms group in a week, and I wanted to have cute little apple dresses for the twins to wear...so, of course, I had to MAKE them! (Actually, I've only finished one so far, and I need to make a couple adjustments on the second one.)

I didn't have a pattern to follow, so it was a learning process. My mom blessed both my sister and me with a serger (to celebrate the fact that our business license came through - woo hoo!!), and this was my first chance to give it a test drive. I have to admit, I was more than a little intimidated when I took it out of the box. This is the serger -


But fortunately, it came with a very helpful DVD, which walked me through how to get started, and I had no troubles getting going.

I based the dress off a basic a-line jumper style pattern. All three fabrics are from Sandi Henderson's Farmer's Market line, which is one of my favorites. She's going to reveal her new line of fabrics on her blog on Monday - can't wait to see what she's got in store for us!! I made my own bias tape using the Clover bias tape maker - SO easy to use!! And I got the idea for making button holes and tying the knots in the straps from a dress I saw on Sandi's blog too.

I did learn from the first dress, after trying it on the girls, that I need to put the button holes all the way at the top of the dress - because as they are placed on this one, the top sort of flops over a bit. And it is HUGE on them right now - plenty of room for growing!!! It's light enough to be worn by itself as a dress, but roomy enough to be worn over a turtleneck and leggings when it is cold out. BUT I didn't make the straps long enough to grow with them for as long as the dress will fit...so I will make longer straps for the second dress - because it will continue to fit as a tunic top long after it is too short for a dress.

This is the bottom hem - also covered in bias tape.

This is the back.

I just LOVE this apple print, and am excited I still have almost a full yard of it left even after making the 2 dresses. Wonder what else I'll make?!

Friday, September 11, 2009

Baby-wearing for toddlers!

A close friend of mine is having a birthday party tomorrow for her two oldest daughters - one is turning 3 and one is turning 5. I made a camera cozy for the 5-year old (I'll post pics at some point) and am putting a disposable camera in it - they have a cross-country trip coming up, and she'll feel like quite the big girl getting to take her own pictures along the way.

The 3-year old has a baby doll who she loves dearly and carts around everywhere...she once left the poor doll here at our house and was very sad for the few days during which they were separated. Since my friend wears her youngest in a sling a lot, the 3-year old is quite accustomed to seeing her baby sister being worn in a sling much like the one pictured...so I thought she would love the chance to wear her own baby just like her mom wears her sister.

However, having never made one before, I decided I needed to try it out before giving the gift away, so I tried it on Makayla with a bear. She LOVED it. Sorry some of the pictures are a little blurry - I had a hard time getting her to stand still!

She even gave a demonstration of how easy baby-wearing can be when multi-tasking, such as when you need to ride a toy pony.

I'm pretty sure the 3-year old will LOVE her gift. I'm equally sure I now need to make slings for two little girls in my house!

LinkWithin

Related Posts Plugin for WordPress, Blogger...