Wednesday, March 30, 2011

Elmer's Giveaway for National Crafting Month!


So...I told you what a GREAT time my friends and I had crafting the night away last week with all of the awesome products Elmer's sent us, right?  Well, check it out.  Elmer's was SO generous in sending the crafty goodness that I actually had some leftover goodies after my party - and since we ARE wrapping up National Crafting Month, I decided I'd like to share the goodness with one of you, my readers!  

First - what do you win?  Everything in that picture above!  

  • A pair of regular scissors
  • Two pairs of decorative scissors
  • An ergonomic delux craft knife
  • A second craft knife
  • A circle cutter
  • A corner punch
  • Two boxes of photo corners
  • Two boxes of adhesive squares
  • Two giant extra-strength glue sticks
  • A quick-dry dual tip glue pen
  • A roll of scrapbooking tape
  • A box of glue spots
  • Two boxes of 5 acrylic paint markers each
  • A package of 18 gel pens

Whew...that's a LONG list!  I'm telling you - this is one AWESOME box of craft supplies!  Regardless of your level of crafting - even if you just have kids or are a homeschooling mom, you NEED this box!  You will be able to use everything in this box!

How to win?  Just leave me a comment on this post telling me what you would do with all of this crafty stuff...that's it.  Please only one entry per person.  The giveaway will be open through Friday, 4/1/11, at 7:00 a.m. PST.  I will choose a winner that morning (after I've had my coffee!) and post the winner that day!  Good luck!  

Monday, March 28, 2011

Elmer's Craft & Tell Party - Altered Cricut Cartridge Boxes

While I was at Winter CHA 2011, I had the opportunity to meet Meghann Heft from Elmer's and learned of their new Craft & Tell program.  Basically, Elmer's wanted to send some crafty bloggers like me a big box of crafty goodness to use for hosting a craft party, and then tell the world all about it!  Since I am certainly not one to turn down free craft products, I signed on the dotted line right away!

I decided to invite my friends over for a craft night this past Friday, and planned a project involving altering old Cricut cartridge boxes.  I prepared an example box, and I incorporated a few flowers that some of my friends had been wanting to learn how to make so that I could demonstrate how to make them.  (And check out these GORGEOUS new Pink Paislee House of Three papers - from the Daily Junque line!!)

My sample - an altered Cricut cartridge box

And boy oh boy did Elmer's send the crafty goodness!!  Check out my friend Shelia and me setting up for my party...there were circle cutters, craft knives, swivel knives, scissors, corner punches, glue pens, glue sticks, glue dots, adhesive runners, scrapbooking tape, adhesive squares, photo corners, decorative scissors, gel pens, paint markers, gel pens, foam board, liquid glue, and paper cutters.  There were even a few extras thrown in...some scrapbooking paper, ribbon, sequins, pom-poms...so much fun!

My island looked like an Elmer's and X-acto store display!!

Sheila helping to pack the VERY full swag bags

When my friends arrived, I had everything set up for them - an empty Cricut cartridge box for each person, a huge stack of scrapbooking paper and cardstock, paper punches, flowers of every kind, my Big Kick and Sizzix dies, and all of the Elmer's and X-acto products.  We got so busy crafting that we almost forgot to take very many photos!  Everyone wanted to learn how to make the rosettes using the Sizzix dies, so I demonstrated that, and almost everyone added one to their boxes.  Everyone also wanted to learn how to make the crinoline rose from my box, and I had received prior permission from Tammy Tutterow to use her tutorial to teach them how to make the rose.  It was fun watching my friend Monica, who thought the rose would be "impossible" to make, actually make one of her own for her box - and then take several more die cut crinoline flowers home with her to make more at home!  

Me demonstrating the crinoline rose and new Distress Stains

Kathye covering her box with paper

Allison's box - rosettes, crinoline rose, and layered butterflies

Shelia punched the top layer of her butterflies
from a soda can

My kiddos were appreciative of the sturdy
boxes the goodies arrived in!

All of my friends had a GREAT time - and so did I!  It had been a while since I'd hosted a craft night (I used to hold them regularly, though they used to be "everyone bring your own project" types of craft nights).  All present were in agreement that I needed to start hosting a monthly craft night again, but they'd like them to be more project-based like this one was, so that they could continue to learn new techniques and how to use different tools.  They want next month to be a spring banner!

I'm SOOO thankful to the folks at Elmer's for the fantastic products they sent - and because they were SO generous, I actually have some extra goodies to give away here on my blog!  So...this being the last week of National Crafting Month, you just might want to check back here TOMORROW to see what's in store!!  Just sayin'...

Sewing Tag using Distress Stain and Embellie Gellie

Just a quick post to show you a little sewing-related tag I made today using some vintage sewing pattern material and vintage buttons.  I also used a new accessory called Embellie Gellie by Scraperfect - check out  my review coming tomorrow on Craft Test Dummies!


I also got to use my new Spun Sugar Distress Stain on the tag, plus Distress Inks in Victorian Velvet, Crushed Olive, Vintage Photo, and Walnut Stain.

Monday, March 21, 2011

Friends and Family Event at Consumer Crafts!

So...you're ALL my friends and family, right?  Right???!!  Of course you are!

Well, since you are...I wanted to just let you know about a special savings event coming up in a few days at Consumer Crafts!  You know that I'm on the design team for Crafts Unleashed, the project blog for Consumer Crafts...well, from March 24 - March 27, Consumer Crafts is going to share the love with all of YOU too!


That's right...from March 24 - March 27, you too can receive 25% off all your purchases from Consumer Crafts!!  Just enter the promo code "FRIEND2011" at checkout to receive your discount.  

And, just to give you an idea...at Consumer Crafts, the Cricut cartridges are 40% off of Michaels and Jo-Ann's everyday prices, already!  So, imagine getting ANOTHER 25% off!  What a deal!

So head on over there and check it out...and load up on all your craft supplies!  Just remember - the promotion doesn't start until Thursday!!

Thursday, March 17, 2011

Easy Birthday Banner


I've been wanting to make a birthday banner for our family for a long time, but like so many projects, it just hasn't gotten done.  But my baby, my oldest son, turns 6 today!  (SO hard to believe!)  Last week, I was determined that I would have a banner to put up for his birthday, but I knew I didn't have the time or energy to do the kind of banner I've had on my mind (a fabric banner), so I decided to figure something else out that would make do until I can do something else.

I found the site Lettering Delights a while ago, and I just ADORE their graphics and fonts - they have SO many cute things.  There are lots of freebies you can get just for signing up (which is free), and then there are various things you can purchase and download as well.  Right now they are actually having Dollar Days, and have TONS of stuff on sale...I have a long wish list!  Fonts for a dollar, graphics sets for $2.00...really great deals!!  You can print these things out - OR, you can CUT them out on your craft cutter - like your Cricut (using certain programs), your E-Craft, or your Silhouette.  Click on the link to go check them out!


Anyway, I downloaded this free Banner Day Alphabet, and printed out the letters I needed for a Happy Birthday banner on matte photo paper, 2 to a page at the 5x7 size.  I cut them out using my paper cutter.


Then I laminated them using my Xyron 900, using the double sided laminated cartridge.  


This is how they look after going through the Xyron


Then I cut them apart into individual pieces.  You don't have to be exact on this step, because the laminating is clear, so people won't really be seeing that part once the banner is hung.  Just be sure not to cut too close to the paper, or you will separate the laminating sides from each other and create an opening.

I used my Crop-a-dile to punch holes in them - I just separated them into two stacks and was able to punch through them more quickly that way.  I strung the pieces on simple white paper twine (Ikea), and the banner was finished.  It took me less than an hour, and my son loves it!

Wednesday, March 16, 2011

Freezer Paper Stenciling with Plaid Fabric Paint


Have you ever done freezer paper stenciling???  You haven't????  It is SO FUN, and SO ADDICTIVE!!  Really, trust me, once you try it, you won't want to stop!  It is SO easy, and the results turn out so great, they look like they are professionally done.  I'm not going to re-write the instructions here, because you can google it and find dozens of tutorials for the process...so why re-write it?  Check out this one...why this one?  No other reason than because there are LOTS of pretty samples at the end!  


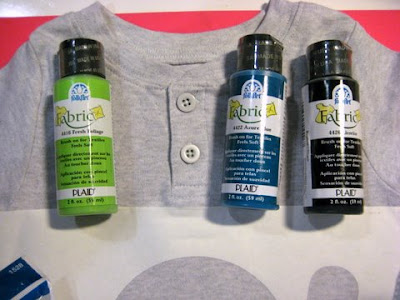
When Shelia came to visit, she brought some onesies for Jeremiah, so we decided to add some fun characters to a couple of them.  I did a turtle on the front of one, and she did some bears on the bum of another.  We used Plaid Fabric paint and Plaid paint dabbers.  I cut the designs in the freezer paper using my Cricut - sooo much easier than cutting designs using a craft knife!


Is he seriously not the cutest turtle EVER?!


Now my girls are asking for butterflies and cupcakes and princesses and all kinds of girly things!!

Tuesday, March 15, 2011

Alcohol Inks and PolyShrink - Just playing around!

Stamp by Stampin' Up!

Just wanted to post these really quick - I've been playing around with some clear PolyShrink (by Lucky Squirrel) and alcohol inks.  This one, I stamped with Jet Black Staz-on on one side, then colored using alcohol inks and a water-brush filled with blending solution on the other side; once dry, I heated using my heat gun to shrink it.  I just love the outcome!! 


This one, I colored using alcohol inks and an ink blending tool with felt; then I flipped the piece over and used a fine-tipped black Sharpie to draw lines in to make it look like a stained-glass window.


When they are held up to the window, you can see that the ink remains translucent.  You can also see that I got a few finger prints on the bottom one, because I touched it before it was completely cool.  I need to perfect my heating method and figure out exactly what to use to press them down after I heat them (when they heat, they curl up, and while they mostly straighten back out, they need to be flattened with a block or something to get completely flat after heating) to avoid unintended impressions.

Not really sure what I will do with these (if anything); just playing for now, because I've never played with these before...but I can see some really cool embellishment ideas in the future!!

Monday, March 14, 2011

Altered Frame using Plaid Crackle Medium

Altered frame using Plaid Folk Art paints and crackle medium

A couple weekends ago, I had the privilege of making this altered photo frame for the birth mother of my 4-month old son, as she needed a gift to give to her mother for her birthday.  (You can read more about that story and our weekend here.)  I had been inspired by this frame by Tammy Tutterow, and got a few of my ideas from her.  I started out with a random $5 framed print from Big Lots, which was about 12" x 12" in size.  After the backing, print, and glass were removed, the frame was painted with a base coat of Pink Balloon Folk Art acrylic paint.  Once dry, a layer of Folk Art Crackle Medium was applied and left to dry overnight (it doesn't actually NEED to dry that long...it just happened to be midnight when this happened!).  The next day, I applied the final layer of Folk Art Titanium White acrylic paint, and immediately as the paint dried, the crackle effect took place - it was very cool!

A close-up of the frame so you can
see the crackle effect - the pink paint
peeks through the white
Then I put a coat of spray adhesive on the actual print from the frame (I used it as the base for my project), and laid on a piece of Warm & Natural batting that I had cut to size.  I laid the piece batting side-down on a larger piece of plain canvas, and on the back side of the print (which was a cross between cardboard and mat board), I applied Glue Ring adhesive by Glue Arts.  (Let me just say, I had never used this before - and it totally ROCKS!  It has major sticking power!!!!)  I pulled the four sides of the canvas around to the back of the print and stuck it down onto the adhesive, and it held perfectly.  Now I had a wonderful blank canvas to work with, and it had just a touch of poofiness under it due to the batting - just the look I was going for!


I had Shelia put on the Distress Inks...Victorian Velvet, Spun Sugar, and Antique Linen.  I showed her how to apply the ink, and using an ink applicator and blending tool, she applied ink all over the canvas, starting darker at the edges and getting lighter toward the center.  I also had her cover the grunge board flourish in Spun Sugar Distress Ink, followed by Spun Sugar Distress Stickles.


I took a piece of natural-colored lace, rubbed the Antique Linen Distress Ink pad over it, then spritzed the lace with water and crumpled it so the ink would disperse a bit.  I dried it with a heat gun, and adhered it to the back sides of the canvas piece using the same Glue Ring adhesive.  At this point, the canvas piece itself was ready to go into the frame; I put a bit of Craft Krazy Glue around the lip of the back side of the frame, and pressed down, then used my glue gun to go all the way around, sealing the edge between the canvas piece and the edge of the frame.  (This was a unique frame that had no pieces to hold the piece in; the print was originally stapled into the frame.)

Shelia had a nice picture of her mom, in front of an elephant, on her phone, so I had her email that to me, and I was able to print that from my computer.  I first added some Spun Sugar ink around the edges of the photo, then distressed the edges of the photo, and finally inked the edges with Walnut Stain ink.  To color the white paper doily, I rubbed the Victorian Velvet and a bit of Vintage Photo Distress Ink pads on my craft sheet, spritzed it with water, and laid the doily on top of it.  I picked it up and laid it down again, to absorb the ink colors, and once it was saturated, I dried it with my heat gun.  

I glued the doily to the canvas using Beacon Fast Finish Decoupage.  I added a glittered cardstock frame from my stash, using the same glue.  I added the grunge board flourish, adhering it with Beacon Fabri-Tac, and added the photo to the canvas with Helmar Liquid Scrap Dots.  

Next, I cut a rosette using the Tim Holtz Rosette Sizzix die, from a sheet of My Mind's Eye paper, assembled it, and inked the edges with Vintage Photo Distress ink. I topped it with a glittered cardstock die cut from My Mind's Eye, and adhered it to the canvas with my hot glue gun.  I made a flower from crinoline using the Tim Holtz Tattered Florals Sizzix die, following Tammy Tutterow's tutorial here, and added a heart button to the center with hot glue.  I used the hot glue gun to adhere the flower to the canvas as well.


I finished the frame by adding an Artisan Element from Pink Paislee above the photo, which I inked a bit with Victorian Velvet and Vintage Photo Distress Inks.  It was self adhesive.  Finally, I tied a piece of light pink organdy ribbon through an Idea-ology word key, heated the ribbon with a heat gun so it would crumple a bit and will not fray, and adhered it to the canvas with my hot glue gun. 

And that's it.  The project was finished - and Shelia loved it...and more importantly, per her report, her mom loved it too.  And THAT makes ME happy!!

Friday, March 11, 2011

Guest Post - Welcome Jackie from Jacabean Designs!!!

Hi guys - I'm SOOO excited today to welcome my very first guest post from my new friend Jackie of Jacabean Designs!!  She designs some really incredible digital scrapbooking kits - one thing I know VERY little about but totally admire!  I know a lot of you cross over between the worlds of paper and digital, so I thought it would be great to have her come over and tell us more about what she does and introduce you to her kits - while I'm over on her blog today talking about some of my crafts!  So with that, I'm going to let her take it away!! ~

Hi everyone! I'm Jackie of Jacabean Designs, and I'm so excited to be a guest here today.   :)  A little about me...I'm a full-time graphic designer.  I love to read, scrap, craft, bake, and have a serious addiction to sweets...especially chocolate!  I'm married to a wonderful guy who puts up with my crafting messes, and even gives me a craft challenge from time to time.  My favorite color is yellow.  I love digital scrapbooking, and also design digital scrapbook kits at Brownie Scraps.  Want to see what's new in my little corner of the world?  Stop by my blog and say hi at jacabean.blogspot.com.

I'm here today to share with you all a little bit about digital scrapbooking.  First, here are my top 5 reasons why I love digital scrapbooking:

1.  I Can Make Multiple Copies
This is why I initially made the switch.  A few years ago, I decided I wanted to make a heritage scrapbook. So many family members were interested, I figured if I made it digital, anyone who wanted a copy could have one.  I'm spending the time to do it, so I might as well get more use out of it, and be able to share my creations with others, right?

2.  The Undo Button!
So I've got this vision, and I'm trying that new paper cutter...and it all goes wrong.  Grrr...I just ruined that picture.  Or how about, I'm writing a paragraph about that special moment, get to the last sentence, and misspell a word.  Argh!  I hate that!  And I imagine I'm not the only one...at least I hope.  :)  Anyway, not only can you undo and try again on the computer, but many programs also have spell-check!  And you can center your text, change the size, spacing, color, etc.

3.  My Photos Are Digital
All of my pictures from the past 5 years at least are digital.  So if I want some to scrap, I've first got to print them.  Unless you're super organized and think ahead (I usually am not), you can't sit down and scrap if you find yourself with a little free time.  BUT if I'm scrapping digitally, I just pick out which photos I want to scrap, and I'm ready to go.

4.  An Endless Supply of My Favorite Things

I'm one of those wackos who doesn't want to use the last piece of my favorite paper, because then, it's all gone.  I know, it's a waste not to use it, but I'm weird that way.  With digital, there is an endless supply!  Want to put 20 of that one flower on your page?  Go for it!  Heck, you can put 100 if you really want, and it didn't cost you any extra.

5.  No Mess!
In my new house, I will have my very own craft room.  Yay!  However, up until now, I've had a bin full of stuff.  Okay, well truthfully, many bins.  And when I scrap?  The living room floor looks like the JoAnn's craft department threw up.  It would drive my husband nuts!  With digital scrapping, it's just my and my trusty computer...a Mac of course, but yours doesn't have to be.  :)

Well, there you have it!  Now, would you like to see some of my pages?  I'll try to show you a variety of styles.  With each one, I'll link you up to the scrapbook kit used, and the template too.  Yes, I am definitely a template scrapper!  I don't always use templates, but I have very little time to scrap, and when I do, it makes things much easier if I have a vision going in.  There's nothing wrong with a little help, right?

This is one of my favorites.  My favorite color is yellow, so I think that has something to do with it.  :)  This was made with Afternoon by Marni Designs and Tempting Templates 7 by Rainy Dayz Designs.


This one is definitely a little different from the everyday pictures.  The kit used is FlutterbyeFaery's Touch of Tan, and no template this time around. This one is all me.  :)


This one is for my heritage album (as is the one above).  It's created with Barren Beauty by PhotoCowgirl and Lazy Days Templates 2 by Hornbuckle Designs.


One last layout...created with Soul Sister by Modern June and Color Lovers 1 by Rainy Dayz Designs.


And what do I do after I've created my pages?  I get them made into books!  I LOVE the feeling of seeing my books for the first time. I actually got my 2010 album in the mail from Winkflash recently, and I'm loving it. Here are a few pics:


That page on the right is a favorite of mine because the handcuffs, badge and whistle are pictures of my hubbies actual police things.  How cool is it to have those in the book?  Oh, and I know it looks like the book won't lay flat, but it will.  This was literally my first time looking thru it, and I ran to grab the camera right away.  No page protectors, but you could choose to print your pages and put them into a traditional paper scrapping album with the page protectors if you like that better.

Ok, one last thing before I leave.  I think I mentioned that I also design digital scrapbook kits.  The front cover of my book shown above is one of my kits (Smiling).  I've got a wide variety of kits in my store.  Here are a couple:


Want to see more?  You can check out my store HERE, and my layout gallery HERE.  Have questions about getting started?  Stop by my BLOG and leave a comment, and I'll answer the best I can.  Well, that's all for now!  Thanks for reading.  :)

~ Thanks so much, Jackie!!  I know I just love your layouts - I especially ADORE the one using FlutterbyeFaery's Touch of Tan.  It is absolutely stunning - the stacked photos just catch your eye (pun totally intended!) and draw you in!  Thanks for your post and for taking the time to introduce us to digital scrapping!

Tuesday, March 08, 2011

My Weekend Haul!!


Oh. My. Goodness.  I don't post about my shopping excursions usually.  (In large part because I have a very limited budget and typically buy one or two things at a time!)  But, BUT, this past weekend - wow - I had SUCH a great experience - I just HAVE to share!!!  While Jeremiah's "other mommy" (aka his birth mom) was here visiting, she and I took a little trip down to The Stampin' Post in Temecula, CA.  It's really not that far from me - maybe a 45 minute drive - but I rarely make it down there, because the traffic can be bad, the parking is terrible, and the store is really long and narrow - which makes it VERY hard to navigate while hauling four young children along.  So while I love their selection (and I love that their designer paper is only $1.00/sheet!), I just don't make it there often.

But on Saturday, they were having a "garage sale," which was really more of a sidewalk sale. The store had tables set outside on the patio with lots and lots of boxes of inventory they just wanted to unload, and they had invited others to set up tables to sell their stamps as well.  So we decided to make the trip and check it out, minus my oldest son - so we just had the baby and my 3-year old twins.  And oh my, was it ever worth the trip!  :)  I went with $40 in cash to spend, and not a penny more - and wondered if I'd be able to get much - and little did I know...I got everything in that picture above for THIRTEEN dollars and some change!!!  YES, you read correctly - $13.25!!!!  Here are a few close-ups...

I love this kooky snowman!!

These Animal Spirit stamps are SO beautiful and detailed,
and the texture stamp will be great for grunge!!

LOVE me some Donna Salazar paper, and this little
stack was already pre-cut!

Simply gorgeous Webster's Pages papers,
mostly Christmas, but one from another line -
for 25 cents a sheet!!

Now, I just wanted to add up what all of this WOULD have cost, if I would have paid regular prices for it.  

Texture stamp - $10.19

Snowman stamp - $9.39

Animal Spirits stamps - $14.99 x 2 = $29.98

Snowflake stamp - $9.79

Tim Holtz Gingerbread Sizzix die - $19.99

7 Gypsies ATC punch - $9.79

7 Gypsies ATC holder - $29.99
The paper, I figured out to come to $14.25 at regular price, based on their normal prices.

Again, I paid $13.25 for my entire purchase.  I WOULD have paid $133.37!!!!  Amazing!!!  Aaaand....the store owner sent out an email saying they are planning to do this again in June!!  Cannot wait!!!

LinkWithin

Related Posts Plugin for WordPress, Blogger...