Tuesday, December 28, 2010

Crafty Organization

You've seen the pictures, and drooled over my crafting space...right?  But have you read about how easy it was to put together my main crafting station?


If you HAVEN'T, then you'll certainly want to hurry over to Crafts Unleashed today and read my post, where I describe in detail how simple it was to create my work station!!  We're focusing on crafty organization all week over at Crafts Unleashed, so be sure to visit all week long for inspiration and tips on how to organize YOUR creative space!  And every Friday, there is a giveaway - so be sure to keep on visiting for your chance to win some creative goodness!

Thursday, December 23, 2010

The (Paper) Trailmakers Challenge Blog - Guest Design Team Project (and Tim tag #10!)


The second challenge for this month at The (Paper) Trailmaker Challenge blog was to somehow incorporate a tag, using the December Paper Trail kit.  Since I have been trying my best to work on Tim Holtz's 12 Tags of Christmas (I am soooo behind, not to mention doing them totally out of order!)...I decided to try using the Paper Trail kit to make one of the Tim Holtz tags, and this is what I came up with.  

I chose day 10 to work with the kit papers, because I thought the snowflake paper went perfectly with this tag - it is SUCH a cool technique!!  You can see Tim's original tag here.  I started out by tracing a standard size 8 manila tag onto the light blue snowflake paper and cutting it out. I glued the paper to the tag, and punched a hole at the top.  I used my  white Adirondack paint dabber along the edges.  Then I randomly dabbed some paint all over the paper, and quickly, before it dried, sprinkled some glass glitter over it - the paint acts as a glue for the glitter.  In the lower right corner, I also added some Glossy Accents, so I could add a LOT of the glitter, to make it appear as if there was a snowdrift.


Then, following Tim's instructions on his blog, I made my snowman out of grungepaper.  I cut the holly leaves for the snowman's hat out of the same paper - but showing the green "Merry Christmas" side, and used a hole punch to punch out berries from the red cardstock in the kit.  I used a cardstock sticker from the kit on the snowman's belly.  


I used the red organdy ribbon from the kit for the snowman's scarf.  I tied it in a knot, but was having a hard time getting it to stay down, so used my Tiny Attacher to put a little staple in it when I adhered the snowman to the tag.  I used my heat gun on the tails of the "scarf," which melted it a little and gave it a sort of wrinkly, more scarf-looking appearance.  I thought it was pretty cool!!


Then, following Tim's instructions, I cut a piece of clear packaging material (yes, PACKAGING!!) I had saved from one of his products, to the size of the tag, and embossed it with my snowflake embossing folder.  I punched a whole in the top, and then used my Cropadile to punch holes in all four corners to use copper brads to adhere the embossed tag over the snowman tag.  I attached the gorgeous shimmery white ribbon from the kit through the top of the tag.  Finally, I took three of the little cardstock banner stickers, edged them with distress ink, wrote "Fa la la" on them, and adhered them to the embossed tag.  


I hope you've enjoyed this tag as much as I enjoyed making it!  And you should definitely check out Tim's other 11 tags for more awesome inspiration!!  And if you've been inspired to make some tags, or to add a tag or two to a project of your own, be sure to link up to the challenge post here.

I want to take a minute to thank Karen and the entire design team at The Paper Trail team for letting me play along with them this month - it's been a true pleasure working with them!!  Even after all of these projects I've made this month, I still have TONS of product left from this awesome December kit - so if you still haven't ordered your December Paper Trail kit, you really should do so ASAP!!  You'll be wanting it to scrap all of your Christmas photos after the holidays, for sure!!  

Wednesday, December 22, 2010

Last minute Christmas gifts - handmade ornaments


If you are one of *THOSE* people, you know, the ones who have had all of their holiday shopping and gift-giving needs taken care of since July, well, then, you may just want to skip right over THIS post.  ;)

BUT, if you are anything like ME, and you are still frantically trying to finish up final handmade gifts and trying to make sure you haven't forgotten anyone on your list,...well, then, I have some really beautiful and quick last-minute ideas to share with you!

For all of these ornaments, I used vintage sheet music - which I absolute LOVE using on projects.  I think it just adds such a wonderful charm and loveliness to any project!!  

For the ornament pictured above (the inspiration for which I got here), of which I made 3 variations, I started by cutting a background from red foil cardstock using the largest of my Classic Scalloped Circles Large Nestabilities die-cutting set.  I then used my hot glue gun to attach ribbons and pieces of Christmas picks.  I used the Tim Holtz Sizzix Rosette die to cut the rosette from the sheet music, and assembled it per the instructions; then attached it with hot glue as well.  Finally, I took grunge board letters spelling "JOY," inked them with Fired Brick distress ink, and applied Fired Brick distress stickles to them.  Once dry, I glued them onto the rosette, and my ornament was complete.  (Note: you can use a heat gun to dry the ink and the distress stickles, but do NOT use a heat gun on regular stickles.)  


I think even my husband was impressed - since I saw him grab one off my craft table this morning on his way to the office to drop off Christmas gifts to the supervisors he manages!!  (That, and he wants to get some return on the "investment" he has made into my crafting supplies!!)


The second ornament also has a rosette made of vintage Christmas music - but it is much larger, and was made using the Martha Stewart Scoring Board.  The ornament has about a 6" diameter, and I had to glue two strips of music together to make it.  Once I made the rosette, I inked the edges and ridges with Fired Brick distress ink.  I then applied a line of glue around the edges and sprinkled silver glitter over it.

For the center, I again used my Classic Scalloped Circles Large Nestabilities to die cut two pieces from a pad of K&Co Christmas paper.  I inked them using distress inks and glued them to the rosette using hot glue.  Finally, I added a dimensional K&Co sticker to the center.  I punched a small hole in the top of the ornament and tied a piece of silver cord through it for hanging.  


I hope this gives you some ideas for quick but beautiful last-minute gifts.  What are your go-to crafts for last-minute gifts?

Sunday, December 19, 2010

New blog name!!

Well, friends, if you've been reading along, you know that "Party of Five" was no longer a good fit for me...as my family has now grown by one precious little boy.    AND, I have decided that I'm going to pretty much focus THIS blog on my crafty endeavors, and do my family blogging on my new blog - http://sixbygrace.blogspot.com.  So...I've been brainstorming for several weeks, trying to come up with some sort of clever new name for this blog, and I'm telling ya - nothing was coming to me!!

I was talking on the phone with a new friend a couple nights ago, and we were mulling around ideas surrounding the idea of "distress," since I love distress ink, distressing paper, distressed projects...etc.  And I did list out several ideas along those lines.

But then, this morning, it just hit me.  I was thinking about what all my friends call me.  Seriously.  All of them.  When they introduce me to their moms, or their husbands, or their friends who I've never met before...it's ALWAYS, "This is my crafty friend Jen."  My crafty friend Jen.  Hmm....

And thus, my new blog name.  I know - a really clever name, eh?  But I'll be the first to admit, coming up with clever names just isn't my strong suit.  And hey - how hard will it be to remember "My Crafty Friend Jen?"  ;)  I think we may have stumbled on to something here!!

In other news - I still owe a couple of you some goodies - I haven't forgotten about you, I promise!!  They are just buried in the disaster that is my studio right now.  That's on tomorrow's list of things to do!

And check back this week - I'll be posting my final project as a guest design team member for the Paper Trail team - and if I do say so myself, it turned out SUPER cute!!  You'll definitely want to come back to check it out on Thursday!!

Sunday, December 12, 2010

12 Tags of Christmas - Day 12!!! (only a few missing!)


So...I'm not admitting I have a problem...or a crafting addiction or anything.  But I did stay up 'til midnight last night just to see the 12th and final tag of Tim's 12 Tags of Christmas.  Oh - and then, I was so inspired by HIS tag, and his wonderful videos, that I may have stayed up all night long creating MY version of tag #12.  But I don't think I have a problem.  Just sayin'....


So, once again, I was completely and totally inspired by Tim.  Did I have the products he used on his tag?  Nope...hardly any of them.  I think the only two products HE had that I used were the Brick Red distress ink and the Rock Candy crackle paint.  Well, those, and I had my own version of some evergreen and pine cones.  Other than that - it was ALL creative improvising.  Which is what I think I love most about this whole experience...it totally stretches me creatively, and forces me to think outside the box.  I have to go through my stash (and seriously, folks - while my Tim stash is minimal, my crafting stash?  is not.  I have a craft room SMOOSHED full of crafting supplies and stash!) and figure out what I can use in new ways that I wouldn't have thought of before.  I LOVE THAT!

So...how did I do it?  
  • The background - I used a piece of pattered paper from a K&Co Christmas paper pad, which I've been loving.  It has wonderful vintage appeal.  

  • The ornament?  I found a pack of chipboard ornaments and snowflakes in my stash.  It wasn't *quite* the shape I wanted, so I cut it with scissors a bit to re-shape it.  It obviously doesn't have the word "JOY" cut out of it - and I definitely would still LOVE to have Tim's ornament die and the word shapers - as well as the magnetic tray - SO versatile - but for now, I was totally stoked about finding this ornament in my stash!  And I love the way the Rock Candy crackle paint blends with the distress ink - so cool!!  Isn't that shiny crackle just beautiful?!
  • The corners?  I don't have any of Tim's awesome corners.  But I did find some copper 1/4 inch metal tape in my stash.  I decided to experiment.  I put three strips of tape down on a piece of scrap cardstock.  Then I ran it through Tim's postcard embossing folder with my Sizzix Big Kick, to give it texture.  I applied a bit of Glossy Accents to the back, and wrapped it around the corners - and voila - my homemade metal corners!
  • The calendar?  I don't have a December calendar stamp.  But I do have a package of Maya Road mini calendar sheers.  It didn't really take the distress ink very well, so I inked a scrap piece of manila cardstock, then glued the sheer to the cardstock, and distressed the edge.  I love that it shows 2010 on it, so that I will always know what year this was made!


  • I used a gorgeous, lightly glittered evergreen leaf, rather than pine needles, for my greenery.  I added a few red berries and a few miniature pine cones, attaching all of them with my hot glue gun.  I would be LOST without my hot glue gun!!
  • I finished it off with a piece of green ribbon on the top.

So, there you have it.  My version of the 12th tag.  I love how clean and fresh it is.  It really is a lovely finish to  the 12 tags, I think.  Don't worry - I still plan to go back and complete the 8 I have missed...I just have to find the time!!  (I can't stay up all night, every night...I *do* have four children who need me to be in an upright position and somewhat coherent during the day!)  The four I have finished do look beautiful on our mantel!!

Saturday, December 11, 2010

12 Tags of Christmas - Day 9!! (yes - out of order)


I had the grandest of plans to keep up with Tim's 12 tags...well, actually, I didn't...I knew better.  That's why I was surprised when I got the first 2 done!!  LOL!  Not only is it hard to find adequate time, but I'm working with a limited "Tim" stash, which thus requires an extra amount of ingenuity - which is also time consuming.  Not that I don't enjoy the challenge - really, I do - it totally stretches me creatively - but between trying to finish up the semester of homeschooling, taking care of a newborn, getting ready for Christmas, and participating on two design teams for the first time ever this month...my extra creative time has been very limited.

Anyway, all that said, I decided to quit thinking I needed to "catch up," and just pick up where I felt like it.  Tim is actually finishing up tonight with his 12th and final tag.  I was able to find the time to do tag #9 a couple nights ago, and am really happy with how it came out, so I wanted to share it with you.  I do still hope to get the rest of them done in the next couple weeks...so we'll see!!


You can see Tim's tag #9 here, if you'd like to compare mine to his.  


I can't wait to see what he comes up with for the 12th and final tag for this year's series.  What a treat it's been to watch his mastermind creativity at work!!

Thursday, December 09, 2010

The (Paper) Trailmakers Challenge Blog - Guest Design Team project


I tell you what - I am really loving playing with this December Paper Trail kit!! First, the frame project was a blast to make, and now, these cards were SO FUN!! These papers by Lily Bee Designs are just wonderfully versatile and coordinate so well together, the kit makes it super easy to put together great projects, no matter what you're making.

This first challenge of "put a stamp on it" was not such a stretch for me - me who recently "de-stashed" by getting rid of over 100 stamp sets!!! Yep, you read that correctly!! Not to fear - I still have well over 50 stamp sets still in my stash, and somehow still manage to pick up a new one here and there - and always have more on my wish list. Actually, my papercrafting - really, my entire artsy-craftsy life - started out with rubber stamping. I went through a time period of several years when I didn't even pick up a stamp, though, and I thought I was done stamping...but then just in the past 6 months or so, I've gotten back into it. There really is SO much you can do with stamping and ink - I think that's what draws me to it...the huge variety of techniques. I'm a technique junkie, of sorts. Anyway, for this challenge, I made three different cards for you, all using different stamping techniques.

**********************************************************


For this first card, I stamped an outline stamp of a couple trees on a small piece of watercolor paper. I like using watercolor paper for this technique because it holds up well and you can move color around nicely on it. After stamping the trees in brown permanent ink, I rubbed distress inks directly on my craft sheet, then used an aqua painter (a brush filled with water - you could also just use a paint brush and water) to pick up the ink and paint the stamped trees. I also painted some snow and a faint sky background. I used a paper distresser along the edges of both the watercolor piece and the red piece beneath it, and inked the edges with distress ink.


Finally, for a little glitz, I added some Christmas Red Stickles over each red dot at the top of the Christmas trees on the background paper. 


***********************************************************

For the second card, I only did a little stamping - I stamped "Joy to the World" on one of the kit's cardstock stickers, layered it on black cardstock, and popped it up on foam squares, on the front of the card; and I stamped a greeting inside the card, as well. I layered a couple of the pattered papers from the kit, using a notebook-paper edge punch along the top of the red one. I added distress ink around the edges of both papers. I made a paper rosette with the black and white paper, using my Martha Stewart scoring board, and layered one of the chipboard buttons from the kit on top of it, placing some additional chipboard buttons beside it. 

The greeting inside the second card.

**********************************************************


Finally, the third card. This was my favorite to make - I think because I love the colors, and because I absolutely LOVE this Tim Holtz Sizzix die that I used. It's called "Townscape," and I just think the miniature houses are adorable!! They have so much potential - and for every season!! Anyway, I created the houses by gluing a piece of the black cardstock to a piece of corrugated cardboard. I then ran it through my Sizzix Big Kick with the Townscape die, cutting the houses. I trimmed just a tad off the bottom, and a little off each end, to fit the card. Then I used my Snow Cap (white) Adirondack paint dabber to ink up my definition background stamp, and stamped the houses. I thought it looked really cool, with the black text on the white snowflakes on the background paper. (Note - I love using my paint dabbers on my stamps - and you will too - but make sure you wash them off right after you use paint on your stamps, or you won't be happy with your stamps the next time you go to use them!) I used the paint dabber to add a little "snow" to the roofs of the houses as well, and then glued the strip onto the card.


Then I added the 25 with Thickers from the kit, and stamped a sentiment inside.


So...there you have it. Now it's YOUR turn!! Have you grabbed your December Paper Trail kit yet? And if so, what are you creating with it? Stamping isn't just for cards, either - you can certainly use stamps on scrapbooking layouts, tags, home decor projects - most anything! Make sure you add your stamped project to our linky widget in the challenge post so that we can see what you've created and for your chance to win some of the Lily Bee papers from this kit!!  You have until Saturday, December 18, at 5 pm EST to get your project linked up for your chance to win!

Wednesday, December 08, 2010

Acrylic Ornaments Using Alcohol Inks


I recently did this project for the Crafts Unleashed design team, and wanted to share it with YOU all too!!


When I first heard the term "alcohol inks," several years ago, I couldn't possibly imagine what use I would have for them.  Alcohol?  In an ink form?  Isn't alcohol for drinking?  Or cleaning wounds? And then there were so many other terms that went along with them - ink applicators, blending solution, metallic mixatives...I admit, I was intimidated!  And so, I just stayed clear of the whole world of alcohol inks!!


That is, until several months ago, when I attended a workshop, and one of the techniques I learned was - you guessed it - how to use alcohol inks.  All of a sudden, a whole new world was opened up to me!  Alcohol inks will work on pretty much any non-porous surface, dry quickly, blend easily, and clean up easily with a little blending solution.  Don't like what you've created?  Swipe some blending solution over what you've done, and you have a clean slate!  They can also be used on porous surfaces, though are less easily "erased."  A light bulb went on in my head, as I realized the many applications and ways I could use them...
  • Only have white/cream buttons, and need one to match your project?  No problem - alcohol ink to the rescue!
  • Need blingage to coordinate with a layout?  Just buy clear or white all the time, and color with alcohol inks!
  • Want to colorize clear acrylic or glass?  Alcohol inks!
  • Want to create your own gorgeous papers?  Alcohol inks on glossy cardstock!
  • Need to adjust the color of fabric or paper flowers to fit your project?  Try alcohol inks!
  • Want to color something detailed?  There are even fillable pens made just for alcohol inks!
On top of being SO versatile, a little goes a LONG way when it comes to alcohol inks - so they are very cost effective.  Just a couple drops will color a lot of area.


When I had to pick a December design team project for Crafts Unleashed, I immediately knew I wanted to do something with alcohol inks!  And when I saw that Consumer Crafts carried fillable acrylic ornaments, I thought this would be the perfect project for showcasing what the inks can do!  You get to choose the colors, and they make a great place to tuck away small gifts, gift cards, or even perhaps a bit of good 'ole cash for a loved one!


Materials used:

Kraft colored crinkle cut paper filling
1105-65  Clear plastic ornament balls
29992-028  Ivory double-satin poly ribbon, 1/4"
DS-6182  Canadian pine garland, 3/4"
RITIM20707  Tim Holtz Adirondack Alcohol Ink, Tuscan Garden
RITIM21247  Tim Holtz Adirondack Alcohol Ink, Gold and Silver
RITIM22121  Tim Holtz Adirondack Alcohol Ink, Pesto
RITIM22060  Tim Holtz Adirondack Alcohol Ink, Latte
RITIM21995  Tim Holtz Adirondack Alcohol Ink, Cranberry
RTIM964  Tim Holtz Adirondack Alcohol Ink, Butterscotch
RITIM19800  Tim Holtz Adirondack Alcohol Inks Blending Solution
RAIBT23616  Ranger Ink Blending Tool (using felt NOT foam)

Instructions:

1.  With a felt pad on your ink applicator tool, add several drops of alcohol ink to the felt by putting the tip of the ink bottle directly against the felt and squeezing for just a second or so.  You can choose one color, two colors, or more...this is entirely up to YOU.  For my first ornament, I went with a combination of cranberry, red pepper, and gold.  (Of note, regular colors of alcohol ink are transparent, while the metallic mixatives will add a more opaque look.)


2.  Add a squirt of blending solution in a diagonal line across your felt pad.  This will help your colors blend nicely on the ornament.


3.  Holding one half of your ornament in one hand, use the ink applicator in your other hand and "pounce" the ink applicator onto the ornament repeatedly, spreading the ink all over the ornament.  You can twist, turn, pounce and have fun with this, until the ornament is covered in ink to your satisfaction.  Repeat with the other half of the ornament - you may need to add more ink to your felt for the second half.


4.  The ink dries almost immediately, but if you find you are not happy with your results, you can simply pour a little blending solution onto a clean cloth, and wipe your ornament clean - and start over!!  How's THAT for letting go of your fear of imperfection?!  (Wait - YOU don't have that problem?  Oh, that's just ME!)


5.  Once you are happy with your ornament, simply fill it with whatever your heart desires, close it up, tie a ribbon through the holes at the top, and finish it off by wrapping a little piece of garland around it.


Have fun making this quick, easy, and affordable holiday project!!

Winner, winner, chicken dinner!

Sorry for the delay - been fighting a bad bout of bronchitis here!

But you don't wanna hear about that...you wanna hear about the winner of the blog hop, right?!


True Random Number Generator  10Powered by RANDOM.ORG


Comment #10 (I had to choose from 11 because there was one repeat comment) was:

Blogger Ryder Royalty said...

Great job! So pretty!!!
Fri Dec 03, 08:55:00 PM PST
Delete
So congratulations, "Ryder Royalty!!"  I'll be in touch with you regarding your prize!!

Monday, December 06, 2010

Go check it out!

Go check out my first post as a design team member over at Crafts Unleashed/Consumer Crafts!!  Today's post is just a quick introduction to alcohol inks, and tomorrow will be another post, with a tutorial on making some quick and fun fillable ornaments, using alcohol inks!!

Friday, December 03, 2010

12 Tags of Christmas - Day 2!!!

(If you are looking for the Paper Trail Blog Hop, please scroll down or click here to get there!)


And...I thought I was going to actually get tag #2 posted ON day #2...because I had it completed fairly early in the afternoon.  But when I finally got the time to blog it, wouldn't you know, our internet was down???  And didn't come back up ALL NIGHT?!  SO frustrating!!!  Ah, well...I guess I did need the rest, since I'm sick...but without further ado, I present my version of Tag 2 of the 12 Tags of Christmas!


Once again, I owned virtually NONE of the supplies that Tim used on HIS tag, but I somehow managed to be innovative (I taught this word to my 5-year old yesterday!) and came up with something that I am pleased with!!  


My sentiment is actually an Inkadinkadoo stamp - it was the only holiday stamp I had that was the right size.  I made my own "baubles," using fake pearls and silver beads, since I didn't own any of his baubles.


Instead of a bird, like his tag had, I used a bird charm, which I found in my stash, and "hung" it from some red colored wire, which I wrapped around two hammered brads.  


And finally, instead of the pine cone/branch stamp, I used one of Tim's mini-holiday stamps - the 4 trees.  The  one product I *really* wished I had was some cut-n-dry felt so I could try out the "make your own stamp pad" technique he used...but alas, I had none.  So I just had to ink my stamp with different colors, and stamp it, then repeat...and then emboss.  I do still want to get my hands on some of that felt, though, and give that technique a try.

I am quite sick, and did NOT get tag #3 done today...and seriously doubt it will get done tonight...but hopefully I will soon get to feeling better!  I am determined to do all 12 tags!!

Oh, and as a p.s. - if you are bored in the evenings, the totally awesome Mario (Tim's business manager) does a fantabulous job of keeping us all up to date on Tim's progress, via Twitter - so check it out!!

Thursday, December 02, 2010

12 Tags of Christmas - Day 1!!!

(If you are looking for the Paper Trail Blog Hop, please scroll down or click here to get there!)


Well, if you've been around here for long, you KNOW how much I *love* all things T!M Holtz!!!!  I am SOOOO excited that it's *that* time of year again - time for his 12 Tags of Christmas!!!  Now...a quick disclaimer...I really don't expect that I am going to be able to keep up with his superhero pace of a tag a day...but I AM going to try to complete all 12 tags before Christmas gets here!  This is going to require LOTS of improvisation, since already on day 1, I discovered just how many things I don't have of Tim's, which he is using on the tags (and day 2, posted today, is even worse - I only have like 2 things he uses!).  

So, to see Tim's day 1 tag, click on "day 1" above.  I looked at his tag, read his instructions, and realized I didn't have:

  • the rickety house die
  • a Prima vine to make a tree
  • the right garland to make a miniature wreath
  • the picket fence die
  • any adornements (thus the star)
  • white cracklet paint
  • white (or any color) sparkly fluff
  • more than 2 colors of blue distress ink
  • Perfect Pearls mist in Perfect Pearl or any misters
  • cut-n-dry felt to make the multi-colored, embossed tag
  • the right stamp set to make the tag
  • the same clip he used to attach his tag
  • any crinkly ribbon for the top of the tag
  • any mica for the windows

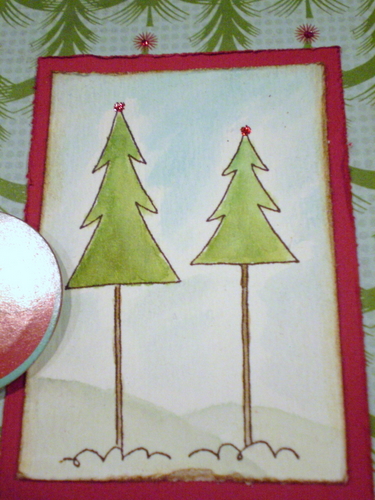
That's quite a list of "don't haves," isn't it?!  ;)  So I improvised.  Here is MY tag.


Not too bad for improvising, is it?


The  house.  I didn't have the die.  But I DO have his On the Edge houses die.  So I cut it, cut one of the tiny houses off the end, put it on my printer/copier, and magnified it.  Then I cut it out, traced it onto grungeboard, and had my house!  I free-hand cut the windows.  Magic!  I also used packaging plastic for the windows.

And the snow.  I had no white crackle paint, nor any Sparkly Fluff.  So my first layer was Golden brand molding paste, which worked great - it just has a really long drying time, and seemed to absorb the distress ink underneath really badly!  I used Tim's glossy accents method next, and then made a mixture of white embossing powder, and both chunky and fine glitter, to make "snow," which I poured over the glossy accents.  It turned out pretty good, I think.  


The tag.  I just used one of his pull-off tags, and inked the edges with Fired Brick distress ink.  Not nearly as fancy as his multi-colored embossed tag, but it will do!  And as for the clip, I actually like the hinge clips better than those little paper clips anyway!!  (Shh...don't tell T!m I said that!!)


The wreath.  I didn't have the RIGHT garland, but I had A miniature garland, thanks to an upcoming design team project for Crafts Unleashed/Consumer Crafts!!  (And just a quick plug - this garland - awesome - 25 FEET for $1.50!!!  PLUS, they are having $1.97 shipping the entire month of December!!)

As for the fence.  I realized that when I went on a scrapping retreat in August, I had cut a bunch of black fences from a different Sizzix fence die, thinking I'd use them for Halloween.  So I took one, used my white paint dabber to make it white, covered it in Rock Candy crackle paint, and then used some of my snow mixture on it just like on the house.  


Seriously - how awesome is the q-tip smoke????  What an awesome idea!!  And as for my background, I used my two blue colors of distress ink - Weathered Wood and Broken China, but I also threw in one color of Stampin' Up ink - Not Quite Navy - and it worked okay.  Also, I used some Vanilla Shimmer Smooch Spritz and some Blue Smoke Perfect Pearls Mist on my craft sheet.  I stamped the snowflakes in the Not Quite Navy ink.


So there you have it - day 1!!  We'll see what I come up with for day 2!!  

And remember, you still have through the 4th to comment on the Paper Trail blog hop post for a chance to win a small prize!!  :)  Scroll down to see that post!!

LinkWithin

Related Posts Plugin for WordPress, Blogger...