Showing posts with label papercrafts. Show all posts

Friday, January 20, 2012

Scor-Buddy Mini Score Board

It's a brand new year, and I'm excited at the possibilities and opportunities in store for this year!  As I'm preparing to head to CHA in a couple weeks (woo hoo!), I have one last product review up on Craft Test Dummies today before we begin a whole new round of reviews on the newly released products.  Have you been watching any of the sneak peeks?  I have, and I've been pinning some of my favorites over on Pinterest!

Screen shot of my Pinterest boards
Go check out my boards to see what I'm looking forward to seeing at CHA, as well as tons of artsy inspiration!  Don't know what Pinterest is?  Click on through anyway and see what you've been missing out on. If you don't have an account, and would like an invitation to join, leave me a comment with your email address, and I'll be happy to send you an invitation.  Be forewarned: Pinterest is addictive!  Many a time, I've gone in search of an idea for one little thing, only to find myself looking at something completely different - 3 hours and hundreds of pins later!

Anyway, this is the Scor-Buddy - a mini version of the Scor-Pal.  It is a scoring board, and this mini one is designed especially with the card-maker in mind.  It's small size, light weight and great portability make it perfect for taking to crops or traveling with.  To read my full review, be sure to head on over to Craft Test Dummies.

Scor-Buddy scoring tool
I'll leave you with a simple, sweet little Valentine's card I made using the Scor-Buddy.  I absolutely love the look of simple kraft with white paper doily, and paper tape is my absolute favorite flat embellishment right now (whether store-bought or homemade).

Card made using Scor-Buddy scoring tool
I've done a couple of fun crafty home projects that I hope to get written up for you soon, and CHA starts the 29th, so until then...get crafty and have fun!

Saturday, December 24, 2011

Christmas Eve and Handmade Ornaments

It's Christmas Eve!  I really can't believe it myself.  This year, the Christmas season has been filled with an unusual sense of both angst and anticipation in our family, and I've tried extra hard to not over-do things, so that I could simply spend every minute possible just soaking up as much family time as possible. A year ago, we were celebrating the completely unexpected addition of a newborn baby boy, Jeremiah, to our family - via legal guardianship.  And this year, we are preparing our hearts to say goodbye to him just four days after Christmas, as he will leave our family to travel across the country to begin his new life with his birth mother. It has been a difficult process, accepting this turn of events, but in the end, love has won out, and Jeremiah is a blessed little boy to have so many people who love him so much.  Needless to say, we will be clinging together as a family, making this year as special as possible.

Since I needed to make gifts as simple as possible this year, I made ornaments for teacher gifts and gift exchanges.  I thought I'd share a few with you.  These are quick to make and could be made at the last minute if you need a gift idea for a last-minute guest.   


For these cute musical heart ornaments, I started by cutting two facing hearts from music paper.  I cut Christmas words out of some Teresa Collins ribbon and adhered it to the front heart, then added an additional sentiment with my Dymo labeler.  I put the hearts together, right sides facing out, and began stitching them together with a zig-zag stitch on my sewing machine.  I left about a 1" opening, and stuffed them with Poly-fil, then completed stitching them closed.  I trimmed around the hearts with pinking shears.  I used Distress Ink to ink around the edges - on the one above, I just used a bit of Gathered Twigs, while on the one below, I used both Festive Berries and Gathered Twigs.  I took a length of jute string and stitched it on to the back of the ornament, using a straight stitch, going back and forth a couple times (you could also just put it between the hearts when stitching them together, but I like the look of the added stitching).  Finally, I spritzed the front of the ornaments with some Biscotti Perfect Pearls spray for a bit of shimmer.


On this third ornament, I used Tim Holtz's Sizzix die, Carved Ornaments 2, to cut the ornament from grunge board, with the Noel Movers & Shapers die in the middle to cut out the word.  I painted the ornament using the Snow Cap paint dabber and let it dry.  Then I applied Denim, Pool, and Snow Cap Mixative Adirondack alcohol inks, using Blending Solution to help move the inks around, on an ink applicator tool, on the ornament.  I used a silver leafing pen to color the letters of "NOEL" and the topper piece, as well as the edges of the ornament.  I used the Movers & Shapers holly leaf to cut several leaves, and I used the Tattered Pine Cone die to cut some pine branches - all from Core'dinations cardstock.  I sanded them, used the Snow Cap paint dabber on their edges, and dabbed them with Rock Candy Distress Stickles.  I wrapped a small piece of fake greenery around the bottom of the ornament and then began arranging the branches and holly leaves on the ornament.  I topped them with a pearl from Tim Holt's Ideaology line. Finally, I tied a piece of jute string and inked seam binding through the top of the ornament, and it was complete.


What do you do for last minute gifts?  Do you have a go-to handmade gift?  

Saturday, October 08, 2011

Spooktacular Signs - The Trick-or-Treat Blog Hop


Welcome to the Trick-Or-Treat Blog Hop! 
October 8-10, 2011
 

Crafter's Workshop and Clearsnap have teamed up for the next three days to create hauntingly inspiring projects for this Halloween season. It's all tricks, treats, and techniques so join us on a fright night jaunt to remember, hopping from blog to blog. Leave your "Trick-or-treat" comment on each blog in the hop in hopes of winning candy, blog candy that is! For every 50 comments posted on this blog we're giving away a set of inks and accessories to spook up any crafter's projects!!! We'll choose the winners from the blog comments posted on all the blogs in the Hop. 

The Clearsnap prize includes Smooch Spritz in Frosted Grape, Green Olive, and Carrot Cake, ColorBox Pigment InkPad in Spooktacular, Glitter in  Grape Fizz, Design Adhesives in "Trick or Treat" and "Eeeeks!?", plus our new Design Foils in Lime Burst. That's alot of spook to go around!


Plus Crafter's Workshop is giving away this fabulous assortment of templates worth over $35!! This is some serious blog candy!!


Receive extra entries in the Hop for following Clearsnap and Crafter's Workshop on Twitter and Facebook and for tweeting or posting on Facebook about the Hop - just post here afterwards that you have followed us or posted about the Hop to increase your chances to win. 


Here are the artsy spooksters to visit:


Julie Fei-Fan Balzer - http://www.balzerdesigns.typepad.com/
Charlotte Jenkins http://suepup.blogspot.com
Mary Dawn Quirindongo -http://mypinkmexico.blogspot.com/ Karen Grunberg- http://www.karenika.com/
Jen Clark - http://mycraftyfriendjen.blogspot.com/  YOU ARE HERE

Happy Hopping!!


We recently visited our local pumpkin patch as a family, and while there, I saw a large family or possibly a group on tour - at any rate, they had some signs on wood sticks to identify their group.  I thought they were really cute, and that some similar Halloween-y signs would make super cute decorations...and that my kids would probably enjoy carrying them while out trick-or--treating (OR just around the house for the next several weeks, as is proving the case...).  So before we left the pumpkin patch, I made sure to gather several twigs - we live in the desert and certainly don't have any twigs in OUR yard!  My kids couldn't wait to see what I was going to do with them!

I started out by cutting cardstock to 5.25" wide by 6.5" long.  I ran each one through my Zutter Distrezz-it-All to distress the edges.  I used the 6x6 Crafter's Workshop trees template and the Clearsnap MetalXtra Platinum ink pad with a blending tool to apply ink to the cardstock to create just a shadow on the background.


After drying the ink, I applied some Glue Gloss to a tree stamp and stamped it over the background trees.  I rubbed some Lucky Penny and Plum Crazy Designer Foils over the Tree (you have to let it get tacky a bit, then rub a bit and apply several times since it's not really meant to be used with the Glue Gloss).  Then I re-stamped the tree using Clearsnap Pigment ink to give it more definition.


I used the Crafter's Workshop numbers template to highlight the number "31," using Clearsnap Espresso pigment ink.  I just love how easy the Queue's are to use - both the chalk ink and the pigment ink.  (Just a note - the chalk ink dries very quickly, the pigment ink a bit more slowly, but both are easy to use.)


I added a word sticker, going around the edges with Dark Brown chalk ink, and went around the edges of the entire sign with the same ink pad.  I added some accents with a Viva Pearl Pen, and my sign was complete.(I punched holes in the top and bottom to put it on a twig.)


On this one, I used the triangle plaid template to create a background, added the clocks over it using that template, and I used Glue Gloss to cover the witch in black glitter.  I *LOVE* using Glue Gloss for glitter - it ROCKS.  If you've never tried it for glitter, flocking, etc. - you are really missing out!!  I again used the MetalXtra Platinum ink pad - to ink the skull and to add highlights to the houses - I just love that ink pad!!  A little goes a long way.


On this third one, I started by using black ink with the tree template, and then used Design Adhesive flourishes in the corners with Plum Crazy foils.  You can see the shimmer somewhat - but it's really hard to see in photographs JUST how shimmery the foils really are!!  I added the skeleton and the Halloween card - inked with Lavender chalk ink - and the "spooky" word sticker.  I went around the edges of the sticker and sign with Espresso pigment ink.


Finally, the last sign.  I started by using the damask template, and sprayed using Wine Berry and Silver Foil Smooch Spritz.  Then I applied some Glue Gloss on the house, and again applied the Designer Foils, a little at a time.  While it didn't work perfectly - it sort of has a spooky, haunted look to it, which is fitting with the theme!  I finished it with a greeting.


For now, the signs are gracing our entry-way table, along with a few other Halloween decorations...though I had to fight my children off to get them to leave them be long enough for me to snap photos!  I have no doubt they will be missing soon, and there will be 3 little monsters running through the house sporting spooky signs!


Now on with the blog hop!!

Monday, March 28, 2011

Elmer's Craft & Tell Party - Altered Cricut Cartridge Boxes

While I was at Winter CHA 2011, I had the opportunity to meet Meghann Heft from Elmer's and learned of their new Craft & Tell program.  Basically, Elmer's wanted to send some crafty bloggers like me a big box of crafty goodness to use for hosting a craft party, and then tell the world all about it!  Since I am certainly not one to turn down free craft products, I signed on the dotted line right away!

I decided to invite my friends over for a craft night this past Friday, and planned a project involving altering old Cricut cartridge boxes.  I prepared an example box, and I incorporated a few flowers that some of my friends had been wanting to learn how to make so that I could demonstrate how to make them.  (And check out these GORGEOUS new Pink Paislee House of Three papers - from the Daily Junque line!!)

My sample - an altered Cricut cartridge box

And boy oh boy did Elmer's send the crafty goodness!!  Check out my friend Shelia and me setting up for my party...there were circle cutters, craft knives, swivel knives, scissors, corner punches, glue pens, glue sticks, glue dots, adhesive runners, scrapbooking tape, adhesive squares, photo corners, decorative scissors, gel pens, paint markers, gel pens, foam board, liquid glue, and paper cutters.  There were even a few extras thrown in...some scrapbooking paper, ribbon, sequins, pom-poms...so much fun!

My island looked like an Elmer's and X-acto store display!!

Sheila helping to pack the VERY full swag bags

When my friends arrived, I had everything set up for them - an empty Cricut cartridge box for each person, a huge stack of scrapbooking paper and cardstock, paper punches, flowers of every kind, my Big Kick and Sizzix dies, and all of the Elmer's and X-acto products.  We got so busy crafting that we almost forgot to take very many photos!  Everyone wanted to learn how to make the rosettes using the Sizzix dies, so I demonstrated that, and almost everyone added one to their boxes.  Everyone also wanted to learn how to make the crinoline rose from my box, and I had received prior permission from Tammy Tutterow to use her tutorial to teach them how to make the rose.  It was fun watching my friend Monica, who thought the rose would be "impossible" to make, actually make one of her own for her box - and then take several more die cut crinoline flowers home with her to make more at home!  

Me demonstrating the crinoline rose and new Distress Stains

Kathye covering her box with paper

Allison's box - rosettes, crinoline rose, and layered butterflies

Shelia punched the top layer of her butterflies
from a soda can

My kiddos were appreciative of the sturdy
boxes the goodies arrived in!

All of my friends had a GREAT time - and so did I!  It had been a while since I'd hosted a craft night (I used to hold them regularly, though they used to be "everyone bring your own project" types of craft nights).  All present were in agreement that I needed to start hosting a monthly craft night again, but they'd like them to be more project-based like this one was, so that they could continue to learn new techniques and how to use different tools.  They want next month to be a spring banner!

I'm SOOO thankful to the folks at Elmer's for the fantastic products they sent - and because they were SO generous, I actually have some extra goodies to give away here on my blog!  So...this being the last week of National Crafting Month, you just might want to check back here TOMORROW to see what's in store!!  Just sayin'...

Sewing Tag using Distress Stain and Embellie Gellie

Just a quick post to show you a little sewing-related tag I made today using some vintage sewing pattern material and vintage buttons.  I also used a new accessory called Embellie Gellie by Scraperfect - check out  my review coming tomorrow on Craft Test Dummies!


I also got to use my new Spun Sugar Distress Stain on the tag, plus Distress Inks in Victorian Velvet, Crushed Olive, Vintage Photo, and Walnut Stain.

Sunday, February 27, 2011

Compendium of Curiosities #33 and Simon Says Stamp & Show


The challenge this week for the Compendium of Curiosities Challenge over at Studio L3 is Altered Metal Using Alcohol Inks, and the challenge over at Simon Says Stamp & Show is to show some Stripes...so I created this 6x6 layout demonstrating BOTH.  (And it wasn't just a happy accident for once - this time it was actually intentional!!)  

While I can't give the details on how I did the actual metal technique, I can tell you what I did prior to altering the metal.  I had a plain sheet of aluminum, which I first embossed using the notebook texture fade - to get the "stripes" look. Then I die-cut it with the Tattered Florals die.  


There are stripes all over the place - on the metal, on the cardstock sticker strip, on the piece of patterned paper itself, on the little cardstock note...I love how subtle some of them are.

The stamp set I used on the layout is called "Art & Soul," by Unity Stamps.  It's designed by Marah Johnson, and IT IS GORGEOUS!!!!  I cannot say enough how unbelievably gorgeous it is!  Every stamp I used here is from the set - from the flourishes, to the bird and butterfly, to the quote.  I even stamped the bird in chalk ink on a sheet of PolyShrink and created the tiny bird charm you see - isn't it just adorable?!  I'll be doing a full review of Unity Stamps soon on Craft Test Dummies, so keep a look out for it!


Have a great week - and be sure to "nurture YOUR creative spirit"!!

Wednesday, February 23, 2011

Scrapbook Layout Using Crafter's Workshop Template

I recently had the opportunity to try out some templates from Crafter's Workshop for the first time.  Now, I know what you're thinking...templates, stencils..."Aren't those SOOOO 1980's?!"  I thought so too...until I started playing with these!  These templates (or stencils - whatever you'd like to call them) are contemporary, versatile, and affordable.  Check out my full review of them, as well as other techniques to use with them, on Craft Test Dummies tomorrow!  To see even MORE techniques and read Jenny's review (THE Craft Test Dummy!!), go here.  AND, she even includes a link to a great video full of techniques using these fabulous templates.


But today, I wanted to share this scrapbook layout I made using the 12"x12" template called Birds of a Feather.  And since I have such a hard time just showing you what I made...I'm going to do a little tutorial to show how I made the background, as well as another cool technique!


I started with a vanilla-colored piece of smooth cardstock under the template, and pulled out my Distress Embossing Ink Pad by Ranger.  I love this pad, because it's extra "juicy."  I applied the ink pad directly to the template, pushing down and "squishing" a bit in the more detailed areas.  I decided to only use 2 of the bird houses - and this is part of what I love about these templates...if you only want to use part of it, you totally can!  I removed the template and sprinkled clear embossing powder over the ink, then embossed with my heat gun.


Next, I started applying distress ink over the embossed areas - the embossed areas resist the ink and will stay vanilla.  You can use a damp cloth to wipe over the embossed areas to clean off any wet ink.


Isn't that just awesome?!  I love this technique!  I continued adding ink colors until the entire page was covered and I was happy with it.  

Distress ink colors used: Crushed Olive, Broken China,
Tumbled Glass, Stormy Sky, Wild Honey, Vintage Photo

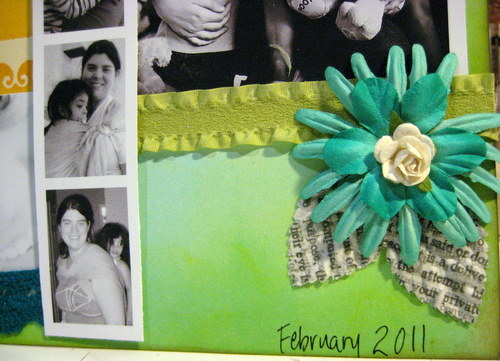
Next, I thought about what I wanted the page to be about.  I decided to scrap about ME - which I never do, and so went searching for photos of me.  Finding them was difficult - I'm always the one TAKING the pictures...but I eventually found a few and chose which to include.  I decided that since I wanted the colors of the page to really shine, I made the photos black and white.

Black & white photos show off the
colors of the page

I began adding embellishments - some of which I've had in my stash for years!  It was nice to finally be using them.  The title and butterflies are all from Marcella by K&Co.  

Title and butterflies from Marcella by K&Co.

I wanted to add some bling, and I had a sheet of Prima Say It In Crystals.  But I didn't want them to be clear - I wanted them to coordinate with my page.  Fortunately, I knew just what to do!  

First, I have been saving the plastic inserts from certain Tim Holtz Ideaology packaging...because they make great palettes for alcohol inks.  So I added just two drops of each of the three colors I wanted to use into each well of one of these plastic inserts.  I let the ink dry.  I took one of my Pentel water brushes (to see a great review of water brushes, check out this one at Craft Test Dummies) and, empty of water, filled it with some alcohol blending solution.  Then, I was able to use my brush to pick up the ink from my homemade palette, and color the bling just the way I wanted it.

Blending solution-filled water brush, picking up color
from dry alcohol ink on plastic package insert

Color your bling any color you like using alcohol inks!

Perfectly colored bling!

I added some Prima flowers, and some really fabulous newsprint leaves I found at Michael's.  For the center of the orange and blue flower, I used my Epiphany Crafts Shape Studio to make an epoxy flower center from a piece of book text.  I added some trims from my bucket-o'-trims - and have no idea what brand they are.

Flowers by Prima; newsprint leaves by
Recollections from Michael's

Flowers by Prima; epoxy center made using book text and
Shape Studio by Epiphany Crafts

Finally, I added my journaling using a dip-pen and black india ink.  I know the dip-pen may seem intimidating, but I find india ink to be the absolute best for writing over ink or paint.  

Journaling done with dip pen and india ink

I love my final result, and I especially love that I created the background paper myself!  I hope you've enjoyed my little tutorial - let me know if you have any questions!


Thursday, February 17, 2011

Valentine's Mini-Book


Valentine's Day was fast approaching, and I still didn't have a card or a gift for my husband...so I was thrilled to see the little mini-book that Tim Holtz posted on his blog on the 11th.  What a wonderful creation, made from just one sheet of 12x12 paper!  This is my version of the mini-book, and I'm pleased to say that my hubs loved it!

Grungeboard heart covered in Fired Brick
Crackle Paint, then Walnut Stain distress ink

Maya Road calendar sheer; Vintage Valentine printed
from TammyTutterow.typepad.com
Three tags (7 Gypsies) for the pockets of the mini-book
Mini-alpha stickers inked with distress ink
Prima flower inked w/ distress ink then covered with
Rock Candy distress stickles; button colored with
alcohol inks
Metal Philosophy Tag colored with alcohol ink
Mini-alphas colored with alcohol inks, then covered
with Rock Candy distress stickles; Epoxy bingo marker
made using Epiphany Crafts Shape Studio
School-yard Valentine page printed from SisBloom.com/blog
and covered in Rock Candy distress stickles
Embossed chipboard from IOD inked with distress ink
then "LOVE" covered with copper Perfect Pearls
LOVE my labeler!!  
Back side; Grungeboard hinge attached with brads
What did you do for YOUR special someone for Valentine's day?

P.S.  You may have noticed the epoxy bingo marker I made using the Epiphany Crafts Shape Studio - be sure to check out my review of this awesome tool tomorrow over on Craft Test Dummies!!

LinkWithin

Related Posts Plugin for WordPress, Blogger...